Cionsystems Multifactor install fail with error “You need to be an administrator to install this product”!

To Resolve this issue on the domain join machine need to follow the below steps for the Installation of Cionsystems Multifactor Auth for all.

STEPS TO BE FOLLOWED WHILE INSTALLING CIONSYSTEMS MULTIFACTOR ..

1. Login to your machine with the user name and password.

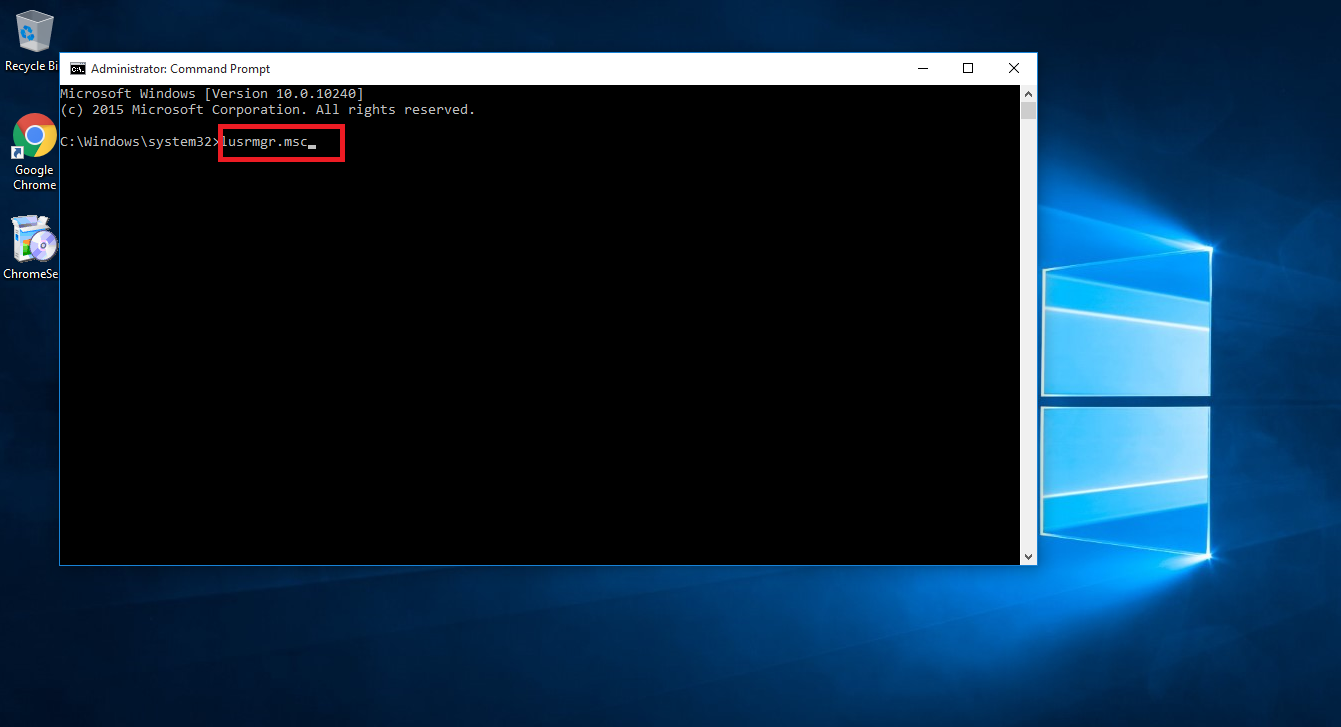
2. Start–> command prompt –>Right click on cmd and run as administrator.

3. After that it will prompt for local administrator credentials. Provide local administrator credentials and click yes (local admin on machine).

4. Type the command lusrmgr.msc and press enter.

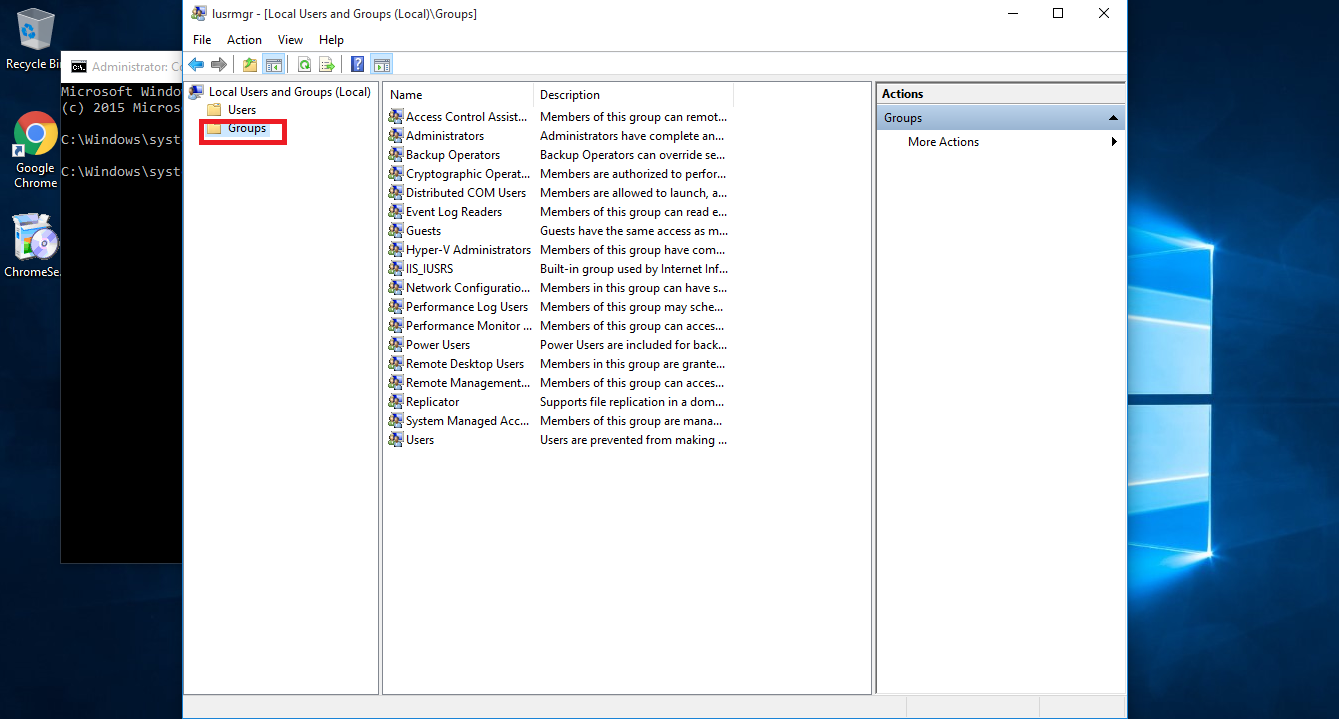
5. Click on groups.

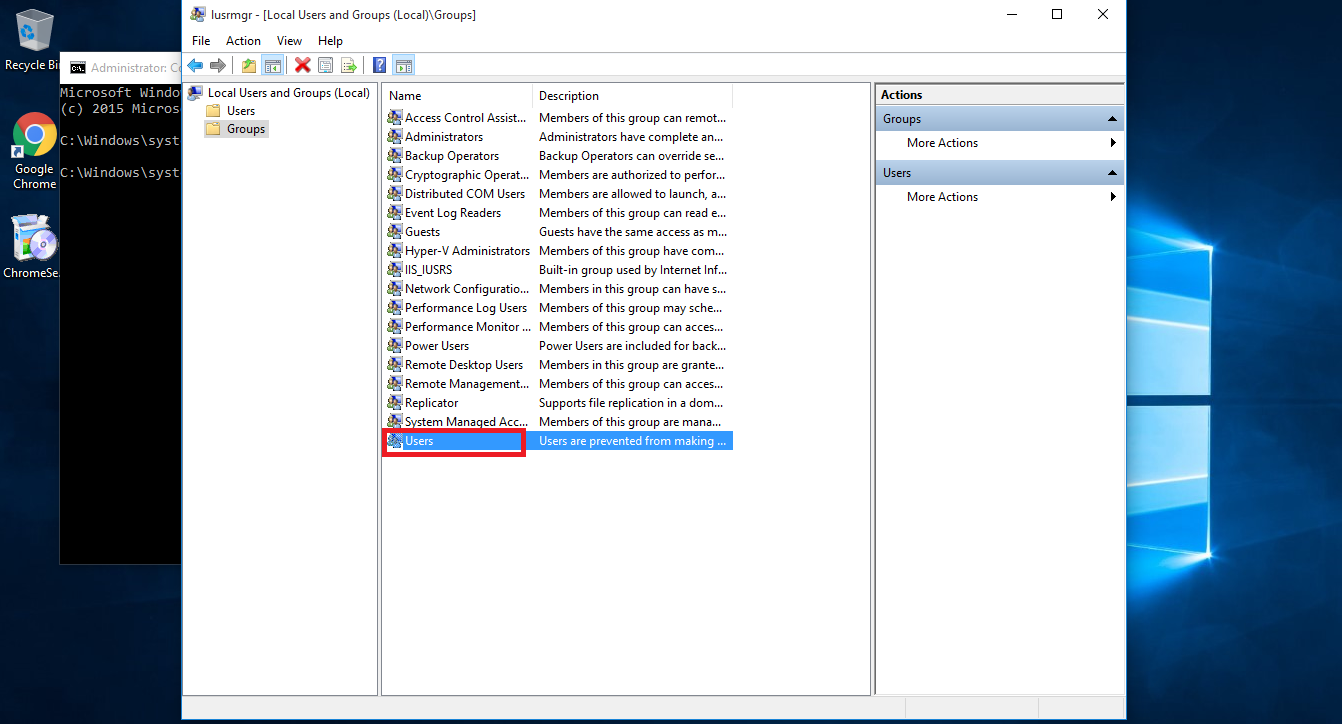
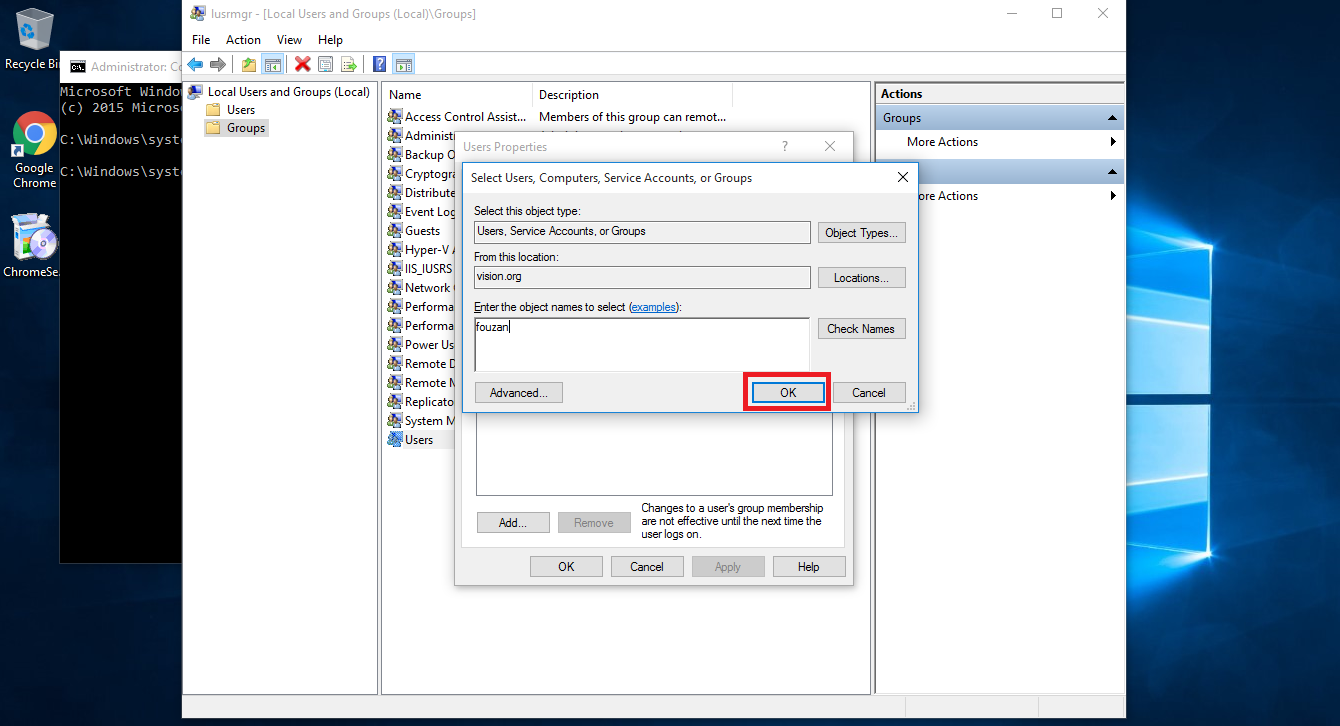
6. Here you need to add the domain user to the local admin administrator group or local user group, double click on Administrators or Users group as shown.

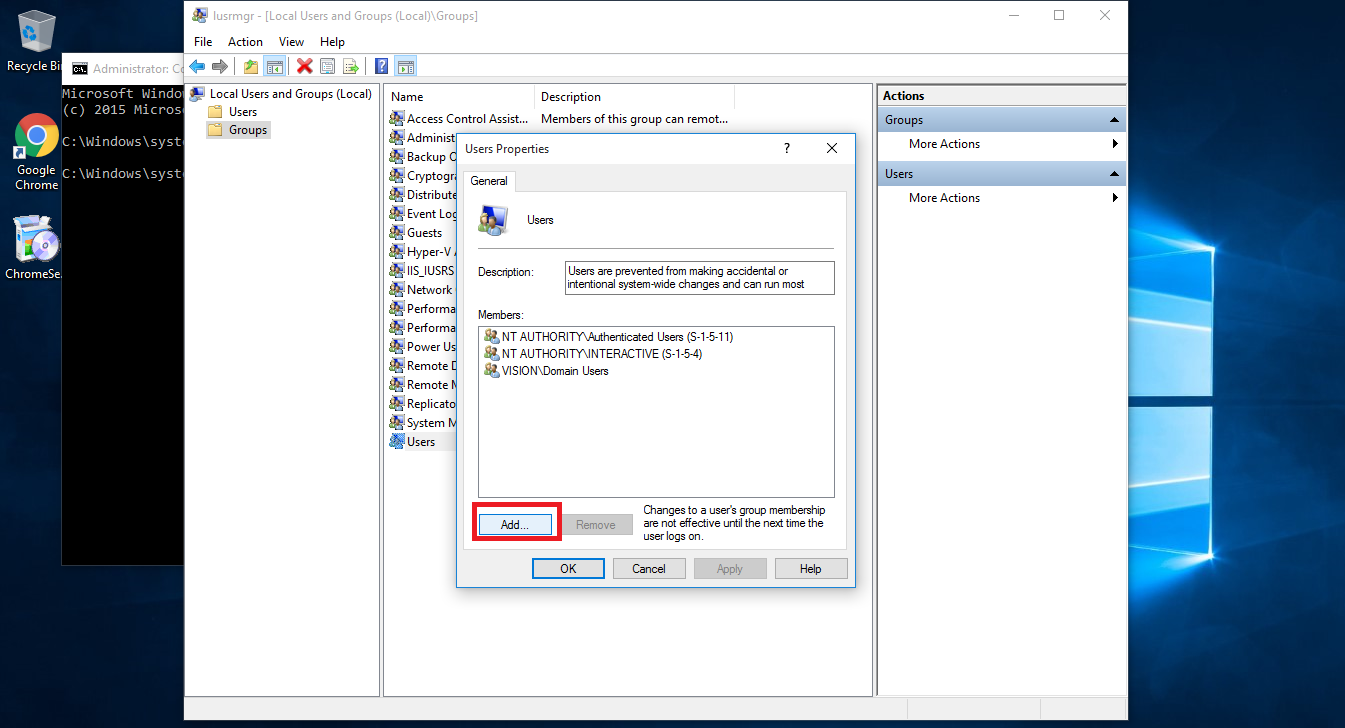
7. Click on add button.

8. Type the domain user name and click on ok button.

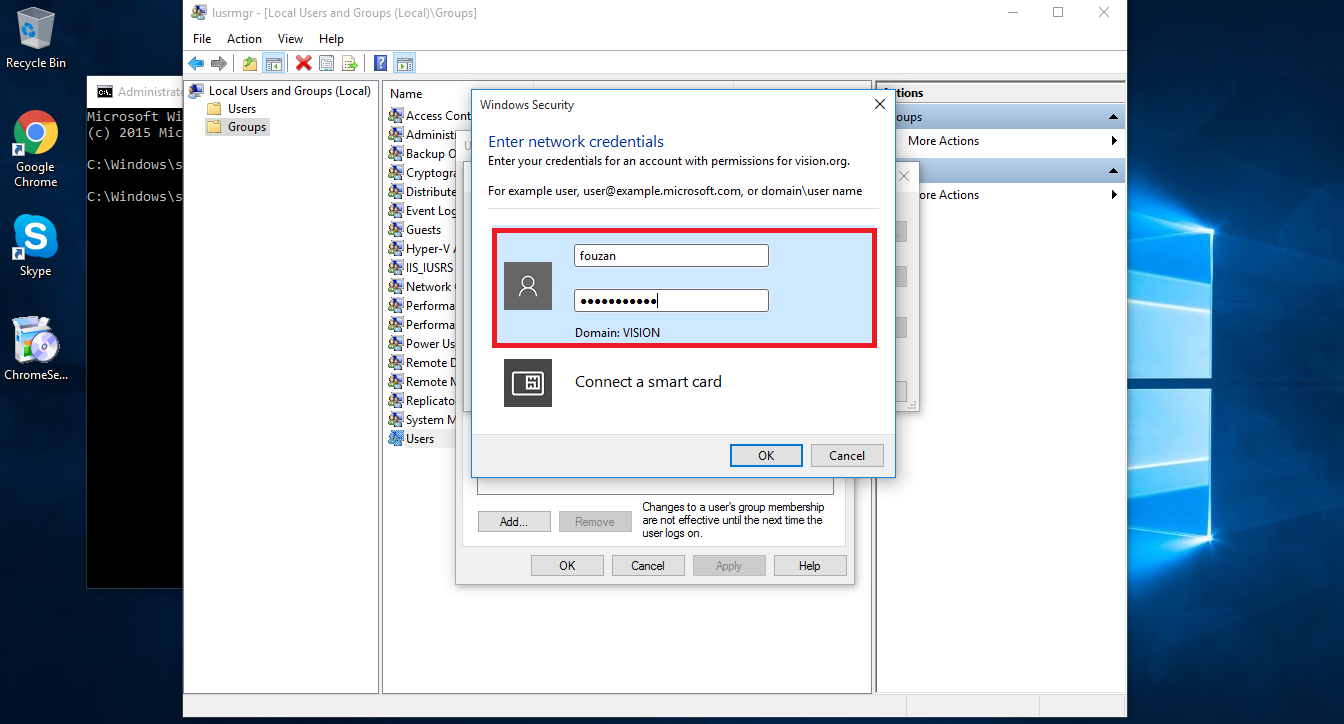
9 Type the domain user name and password and click on ok and apply button.

10.After adding the user restarts your machine.(mandatory)

11. After rebooting double click on the multifactor Auth Installer.exe file.

12. Proceed with installation setup process.

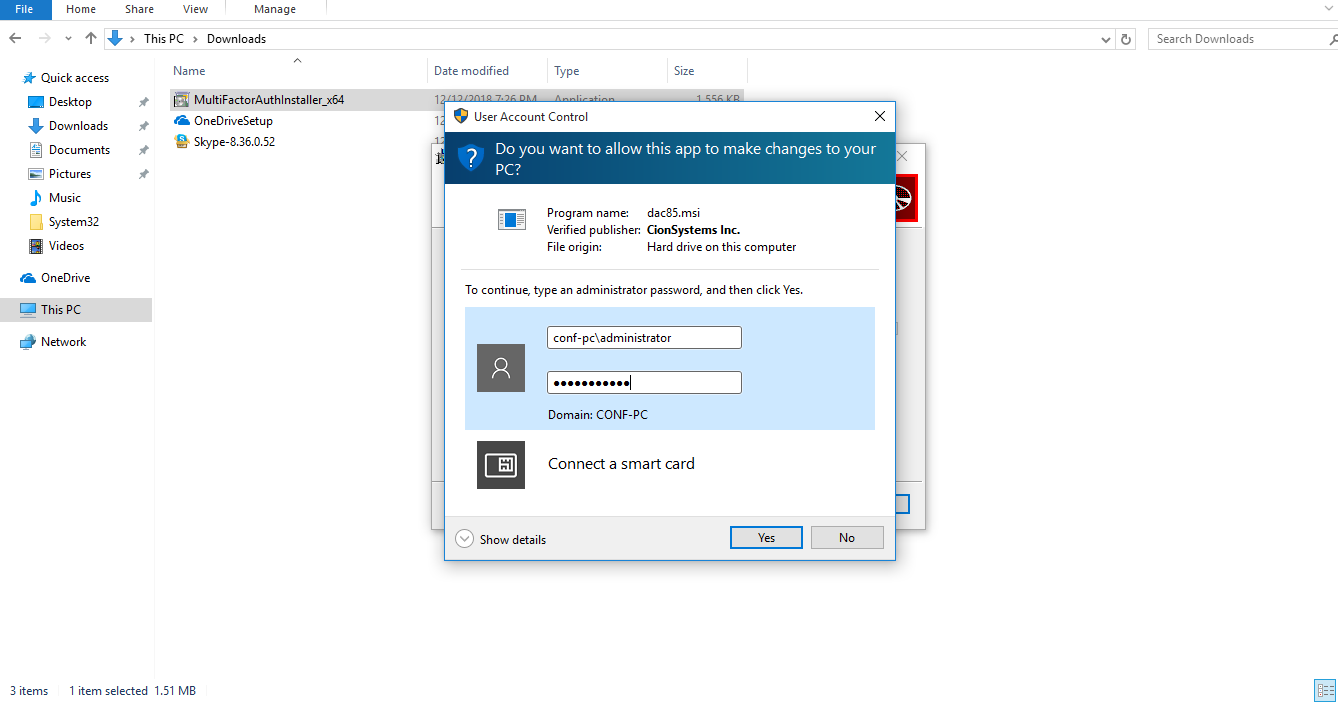
13. Once you click on the Installation button it will prompt for the user name and password type the local admin user name and password.

14. The installation proceeds further and finishes successfully.


Automate Report Generation on Daily /Weekly Basis in ADM Pro.

  1. Login into ADM Pro Manager with admin user

2. Go to Admin option –>Click on Server Settings –> Click on SMTP  Server Settings

3. Enter SMTP Server information, Enter Email address from which mail  id, email has to be send and enter User name and Password then authenticate  it. Now select User Secure Connection (SSL/TLS) option and enter port number. Click on Save button to save SMTP Settings.

4. Go to AD Reports àClick on User à Click on “Recently Not Logged on Users” from Logon Reports as shown below

5. When we click on Recently Not Logged on Users then it will open a Pop up window as shown below


6. As shown above select the domain and select OUS (optional). If OUs selected then it will generate report for that OUs only. Otherwise it will generate complete Domain report. Enter No.of Days value and click on generate button.

7. Report will be generated as shown above

8. Now we need to schedule this report to be generate automatically and the same report will be send to the required mail id on daily or weekly or monthly basis on scheduled time.

9. Go to AD Reports –>Click on User –> Click on Recently Not Logged on Users from Logon Reports and click on Schedule this report option as shown below.

10. Once we click on “Schedule This Report” link button, window will open as below.

11.As shown above click on create button it will redirected to the Report Schedule Settings screen as below .Here enter the Schedule Name and select Schedule Frequency as Daily or Weekly or Monthly and select Email format as anyone from the list.

12. Click on Reports ‘+’ button it will open the popup as shown below

13. Now Select User Reports option by clicking on ‘+’ .It will shows the list of reports. Now select the “Recently Not Logged on Users” report and click on Ok button as shown below.

14. Once we click on ok this report will be added in Reports list as shown below. Now select the date on which date report need to be generate automatically. By Selecting Start from Date option.

15. Now set the time of scheduling .Select Account Status as Active and Enter the Required Email Address to which mail need to be send as shown below.

16. Now click on save button. Once Schedule created it will shows the scheduled list as below

17. Will receive the generated report through mail.

18 Check the mail after schedule time and check the mail attachments.