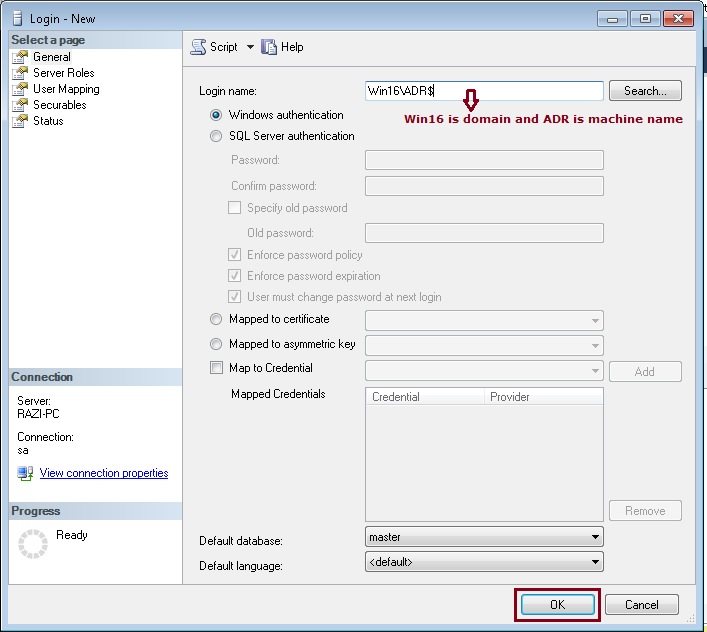
Configuration of Lync Server in Cionsystems ADMPro.

Lync Configuration:

It’s a two step process

1.  Install the pre-requisites.

2. Configure Lync Settings in ADMPro.

Install the pre-requisites.

Please download the  Lync Pre-requisites from the below link.

http://www.cionsystems.com/CA/LyncPre-requisites.zip

Please install the following Pre-requisites on the domain join server where ADMPRO is Installed.

UnZip the “Lync Pre-requisites” file and follow the step by step installation accordingly.

Step 1. Install the Application “vcredist_11_x64” from the Setup1 folder.

Step 2. Install the Applicatin “vcredist_x64” from the Setup2 folder.

Step 3. Install the Application “ocscore” from the Setup3 folder.

Step 4. Install the Application”sqlncli” and after that install “SQLSysClrTypes” from the Setup4 folder.

Step 5. Install the Application “SharedManagementObjects” from the Setup5 folder.

Step 6. Install the Application “admintools” from the Setup6 folder.

Step 7. Assign the below permissions to the Service level account as shown in the below image.

Windows Update : In some OS windows update is required, Install this “ Windows8.1-KB2982006-x64 ” from the WindowsUpdate

folder.

Service level account : It is the account by which you need to configure ADMPRO.

  • Domain Users
  • CSAdministrator
  • Enterprise Admins
  • RTCUniversalConfigReplicator
  • RTCUniversalServerAdmins
  • RTCUniversalUserAdmins
  • Schema Admins

Configure Lync Settings in ADMPro.

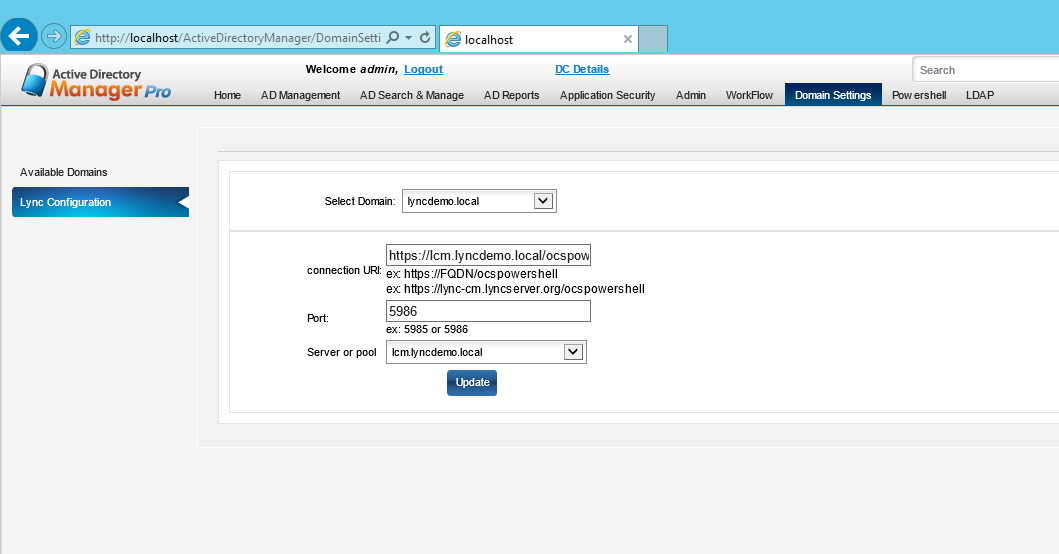
After installing the pre-requisites. You can  configure the Lync Server in Lync Configuration page of ADMPRO.

The fields connection url and port will get enabled and you can enter the details as shown below

and save the settings.

In ADMPRO à Go to Domain SettingàLync Configuration.

Connection URL:  https://FQDN/ocspowershell

Example : https://lync-cm.lyndemo.local/ocspowershell

Port for http : 5985

Port for https : 5986

Server or Pool: Select the server pool.

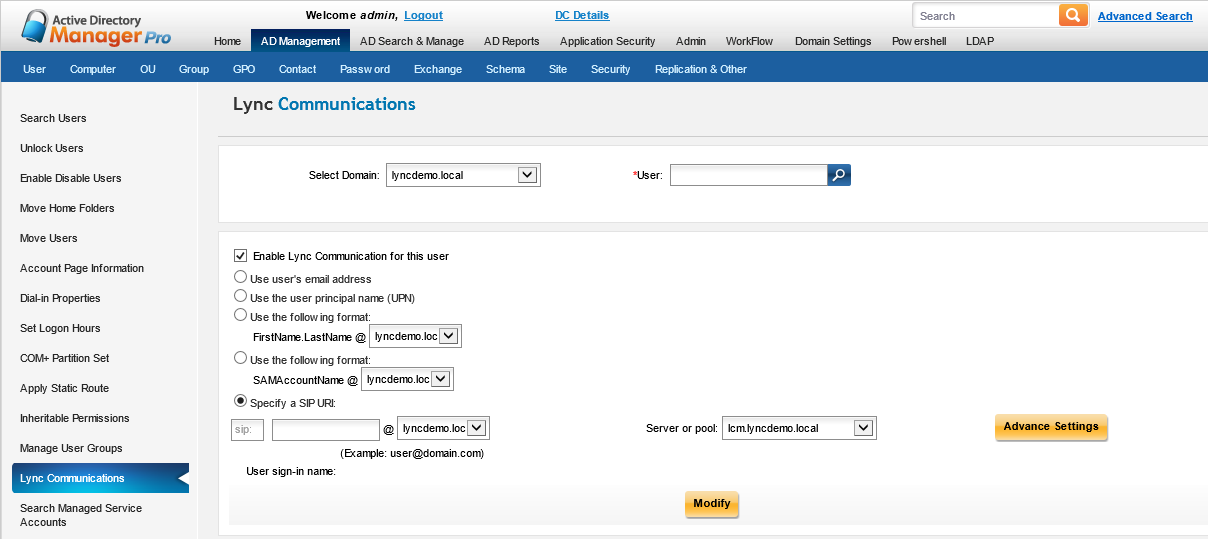
You should see the Lync Communication as shown below.

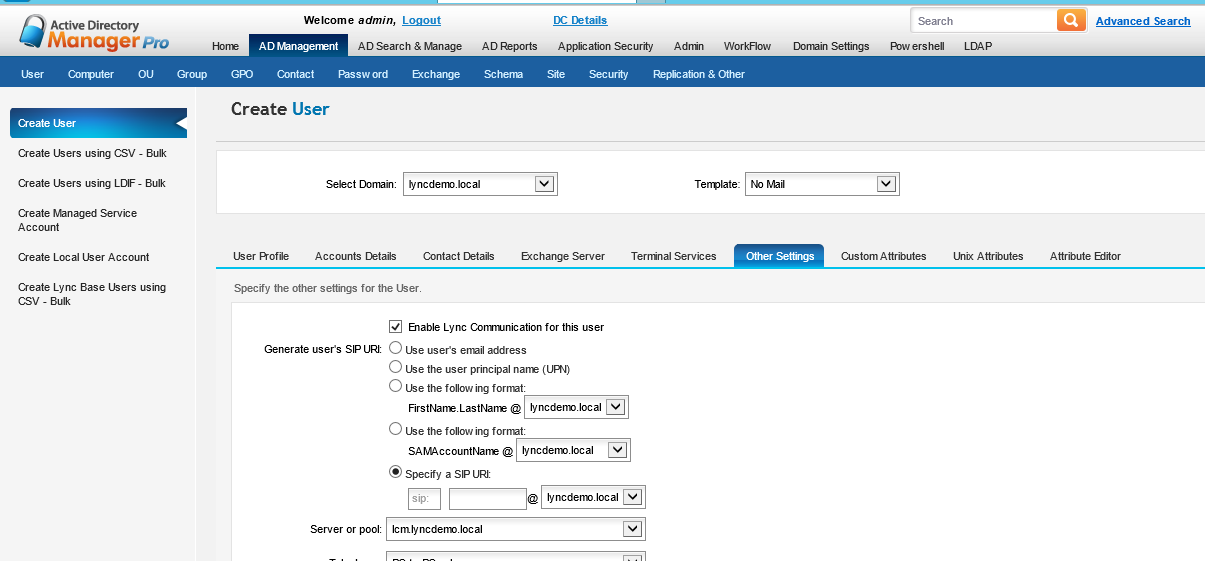
You Should be able to see the same in create user page.


Windows Authentication connecting string–Manual Configuration for ADMPRO DB

Manually Configuring database of ADMPRO

1.Run the ADMPRO db script to create the db.

2.Manual change the config files.

Manually changing of Config files with Sql instance and port no

Below is the Windows authentication connection string for admpro

<add key=”ConnectionString” value=”Data Source=ptm\mssqlserver1,3785;Initial Catalog=CION_AD_MANAGER_PRO;persist security info=False;Integrated Security=SSPI”/>

Note : In data source you have to specify servername\instance,portno

Replace the connection string in all the below files of ADMPRO with the above string
C:\inetpub\wwwroot\ActiveDirectoryManager\ADMSettings.config

C:\inetpub\wwwroot\ActiveDirectoryManager\ADManagerServices\ADManagerScheduler.exe

C:\inetpub\wwwroot\ActiveDirectoryManager\ADManagerServices\ADMJobs.exe

C:\inetpub\wwwroot\ActiveDirectoryManager\ADManagerServices\ADMMBoxSizeNotifier.exe

Restart the above services

Restart the iis.

Thanks,

Razi

De-provisioning of Users in ADM Pro

A. De–Provisioning Template Creation :

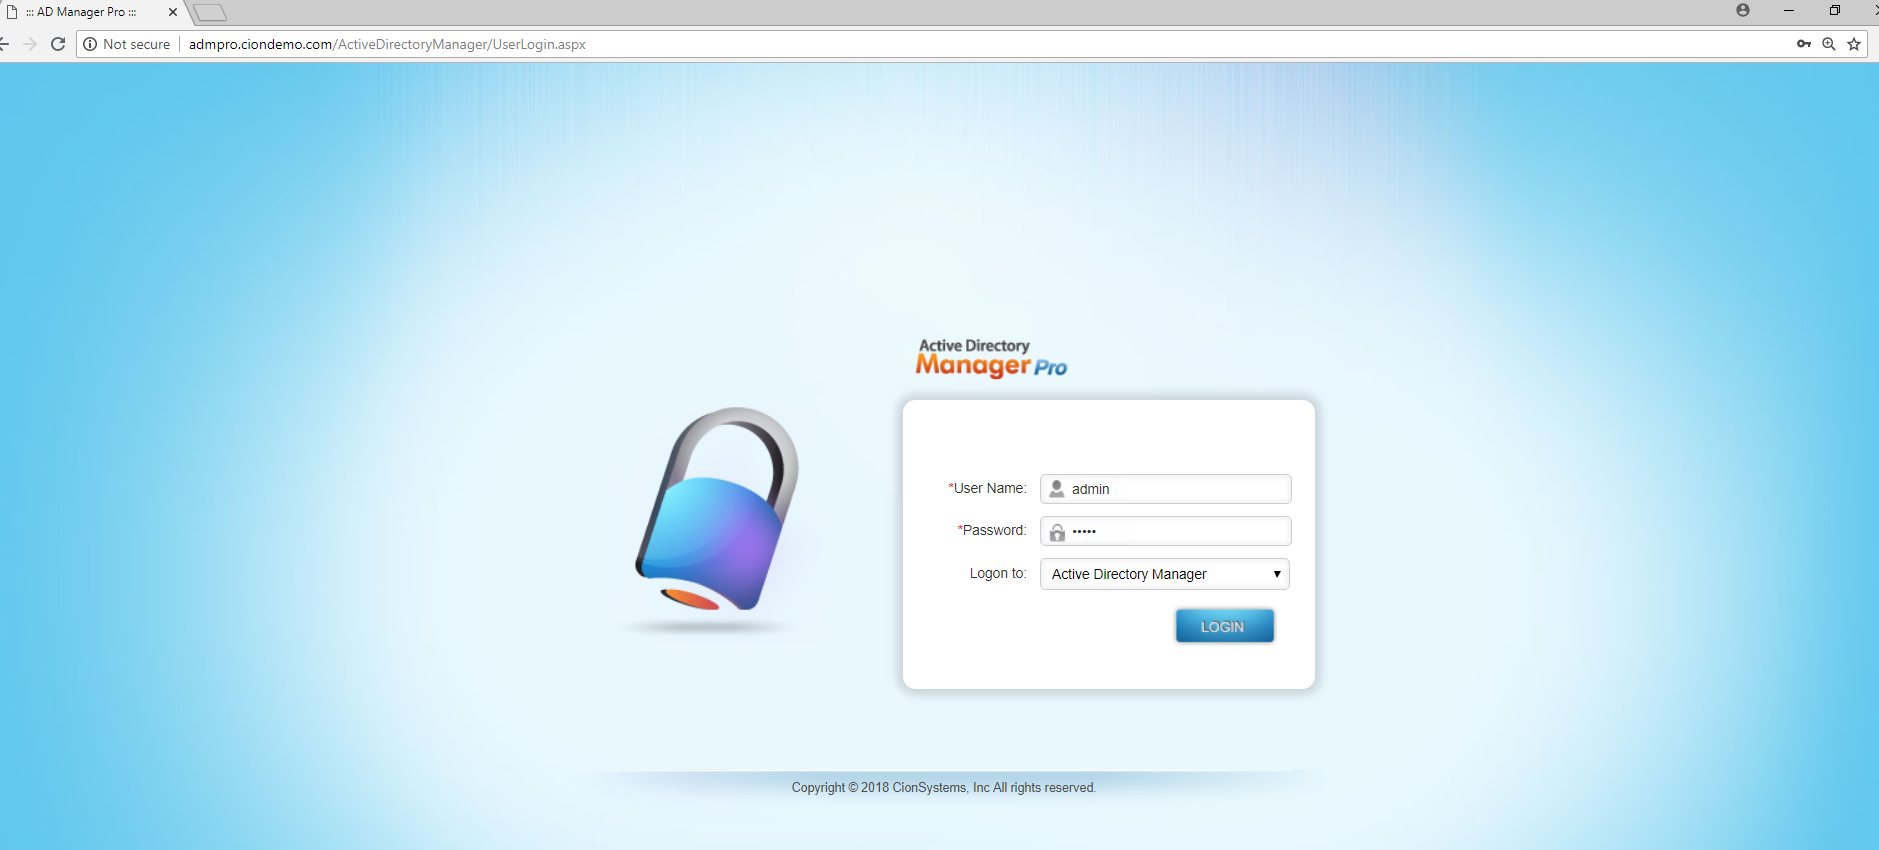
1.  Login to CionSystems ADM Pro Manager with Admin Credentials as below

2.Go to AD Management–>User –>Templates à Click on De–Provision template

3.In De–Provision Templates you can create new De-provision templates by selecting multiple options.
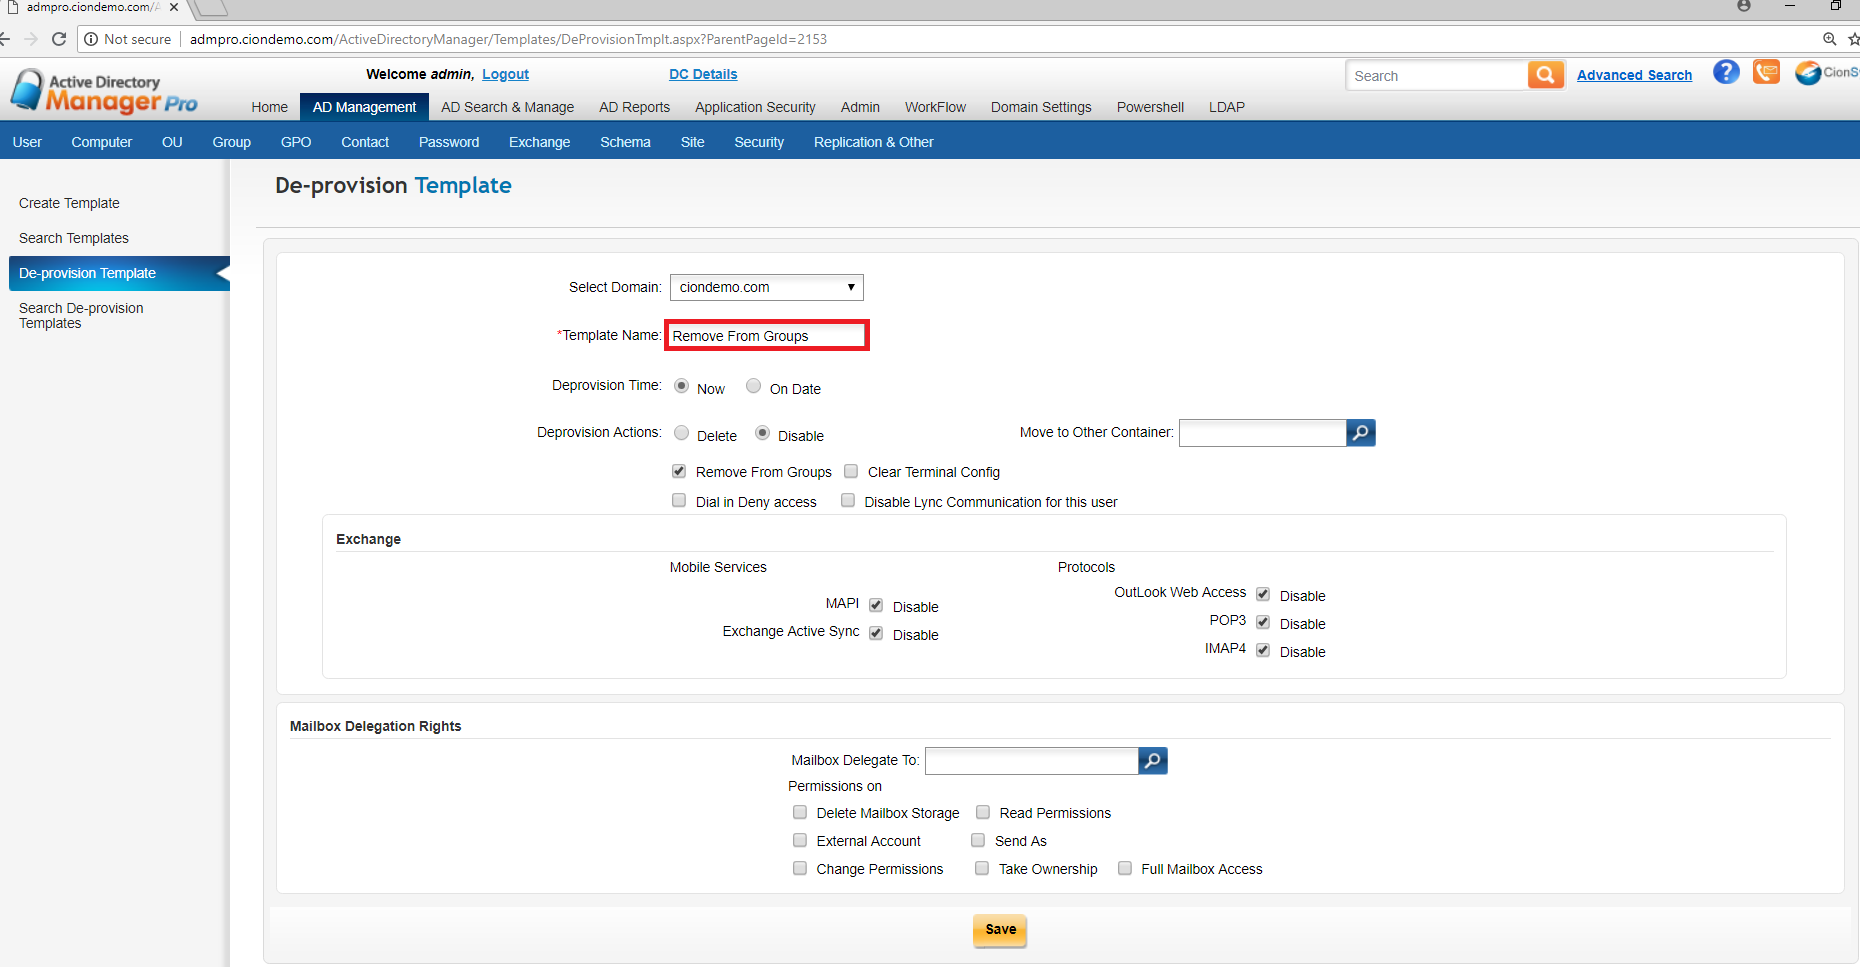
4.As shown in the above Image enter template name and select De-Provision time Option as Now or On Date.

5.If you select Now Option template actions applicable immediately, if you select On Date template actions will be applicable on selected date.

6.In the above image Now is selected in the template.

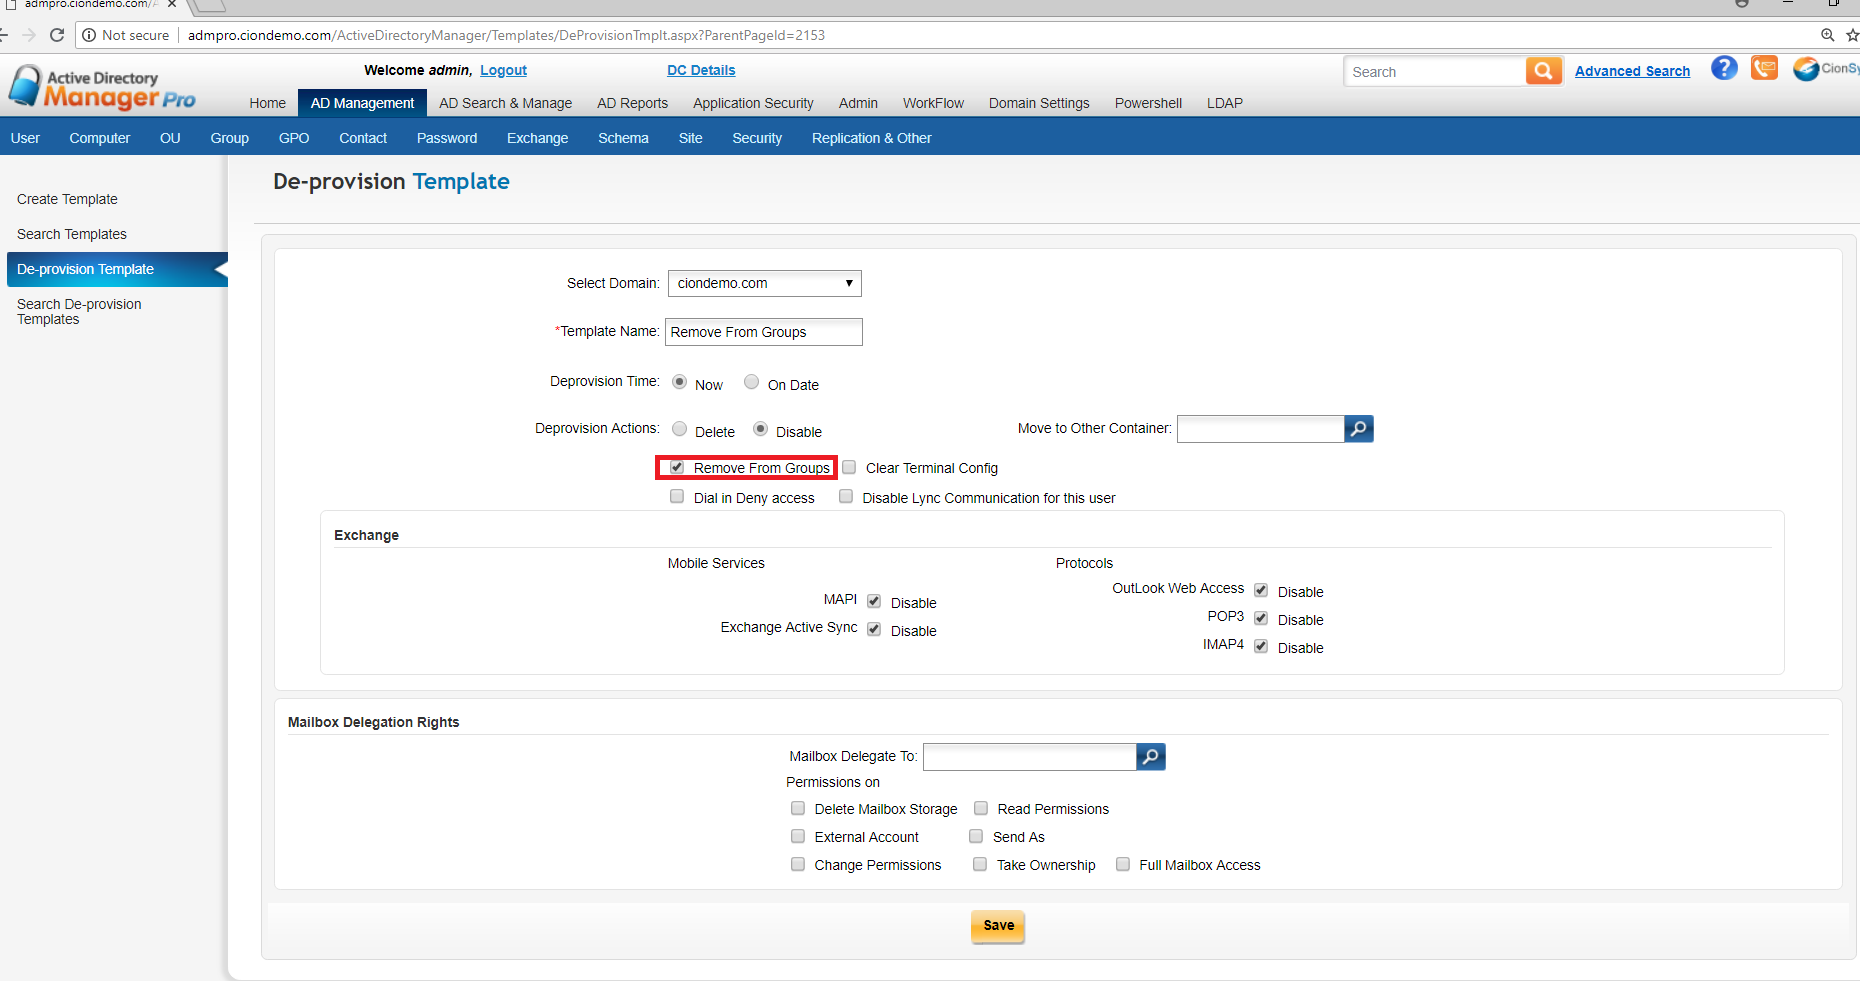
7.From De-provision actions you can select either disable or delete. Here disable option has been selected and other option is selected as remove from groups only as in below image.
8.If you want to move user to other OU. After template is applied then select move to other container option or else leave it blank.

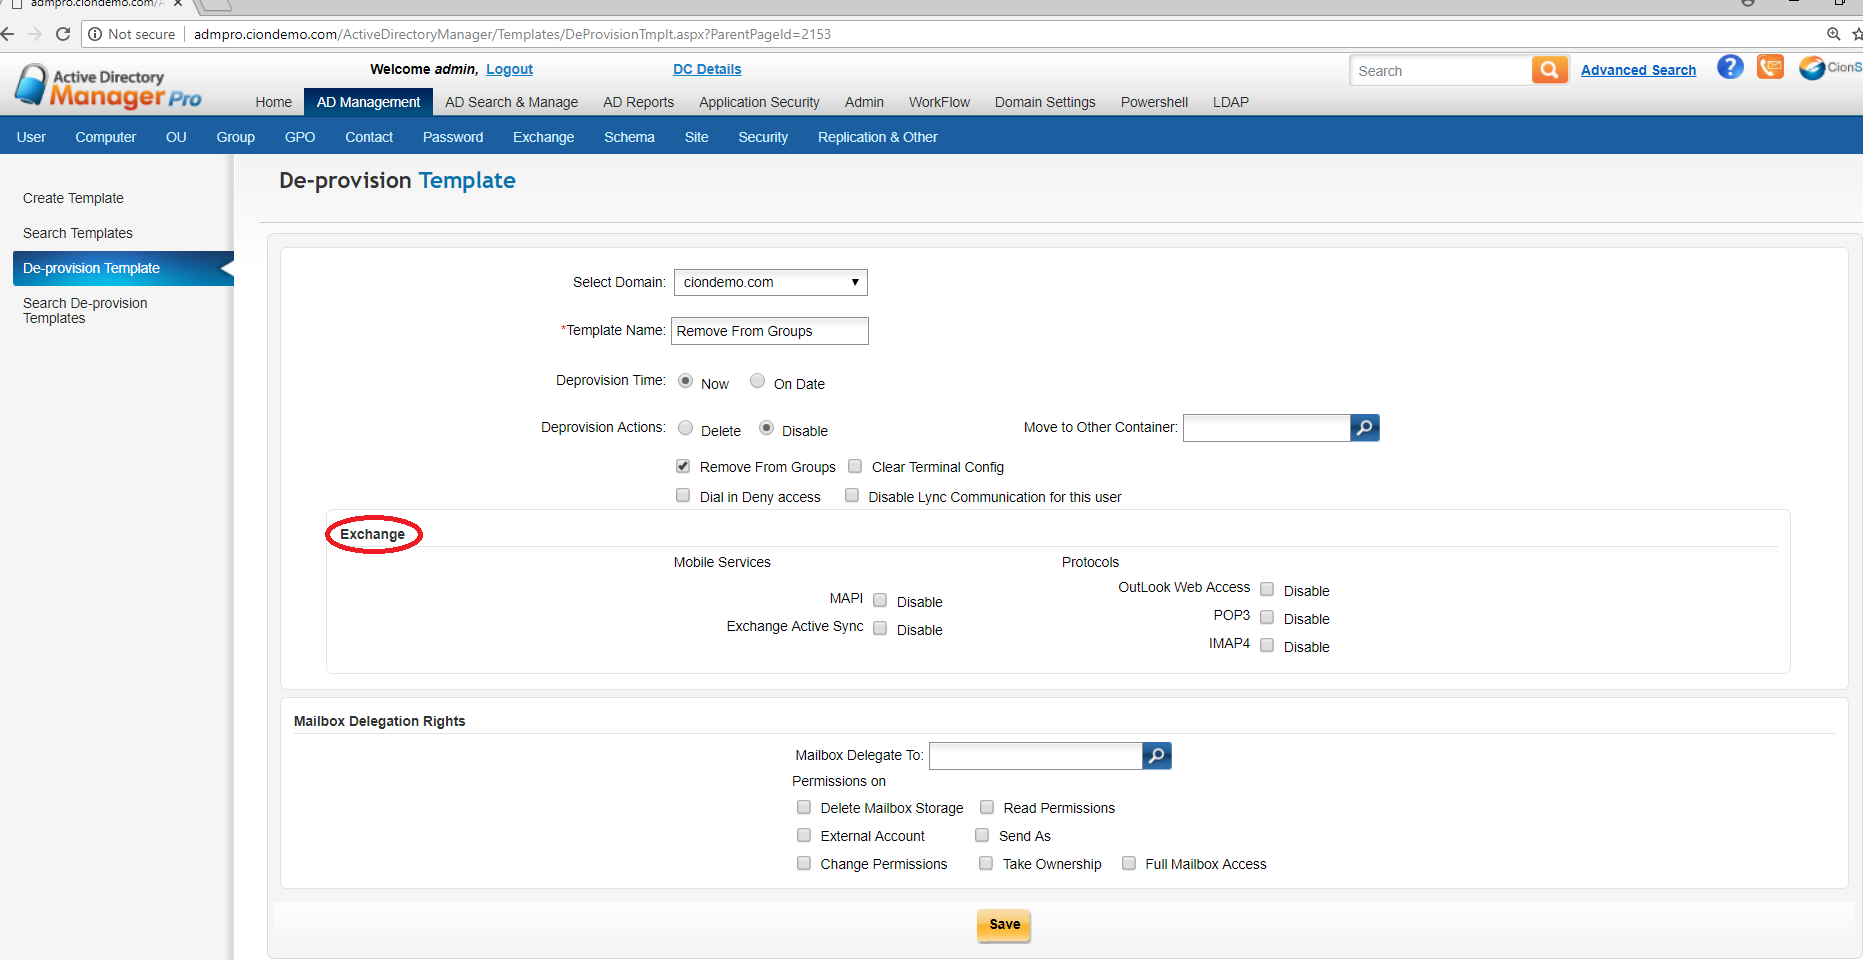
9.If a user is an exchange user you can check exchange mobile services options otherwise un-check the options as shown below in the Image.
10.If exchange user is there then select mailbox delegation rights options otherwise leave it by unchecking these options.

11.Click on save button.

12.Once you save the template it will display the message as remove from Groups De Provision template saved successfully as below.
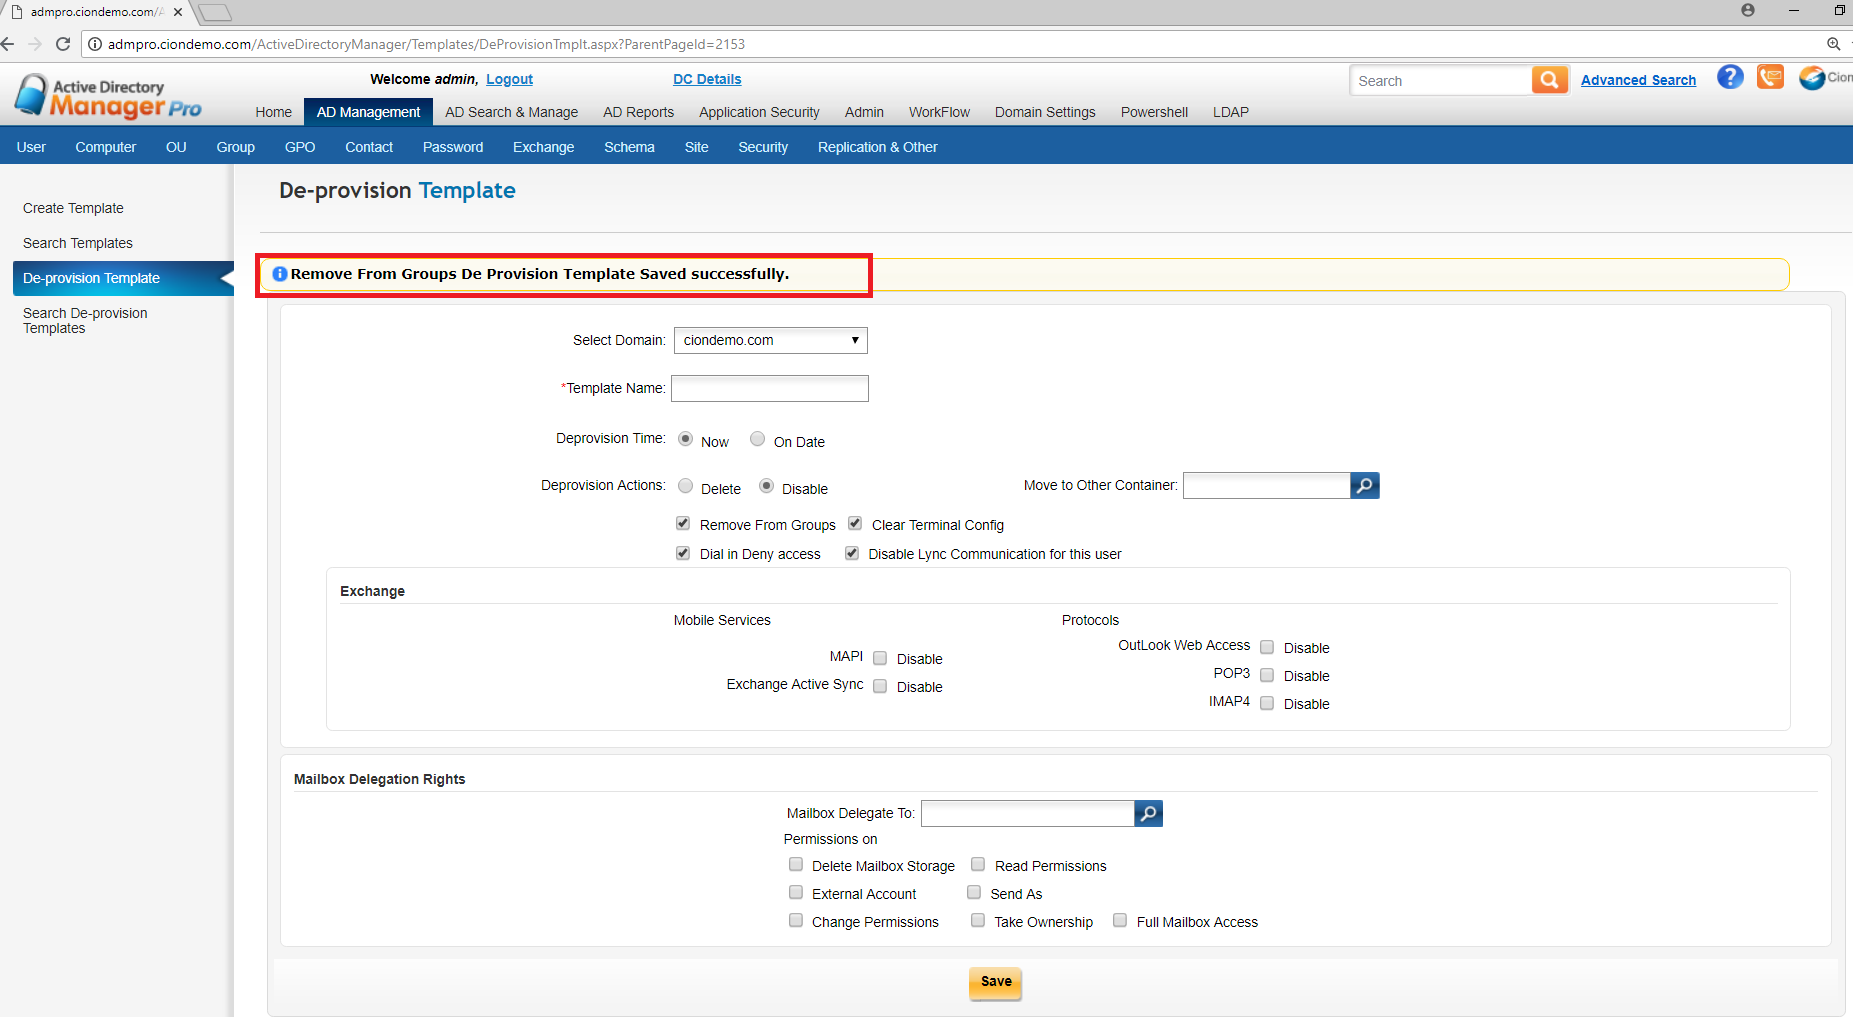
13.The above De–Provision template when applied it will remove User from groups.

14.As mentioned above you can create multiple templates by selecting different options     from De–Provision Template.

15.Created De–provision templates will be shown in Search De–Provision Templates screen as below
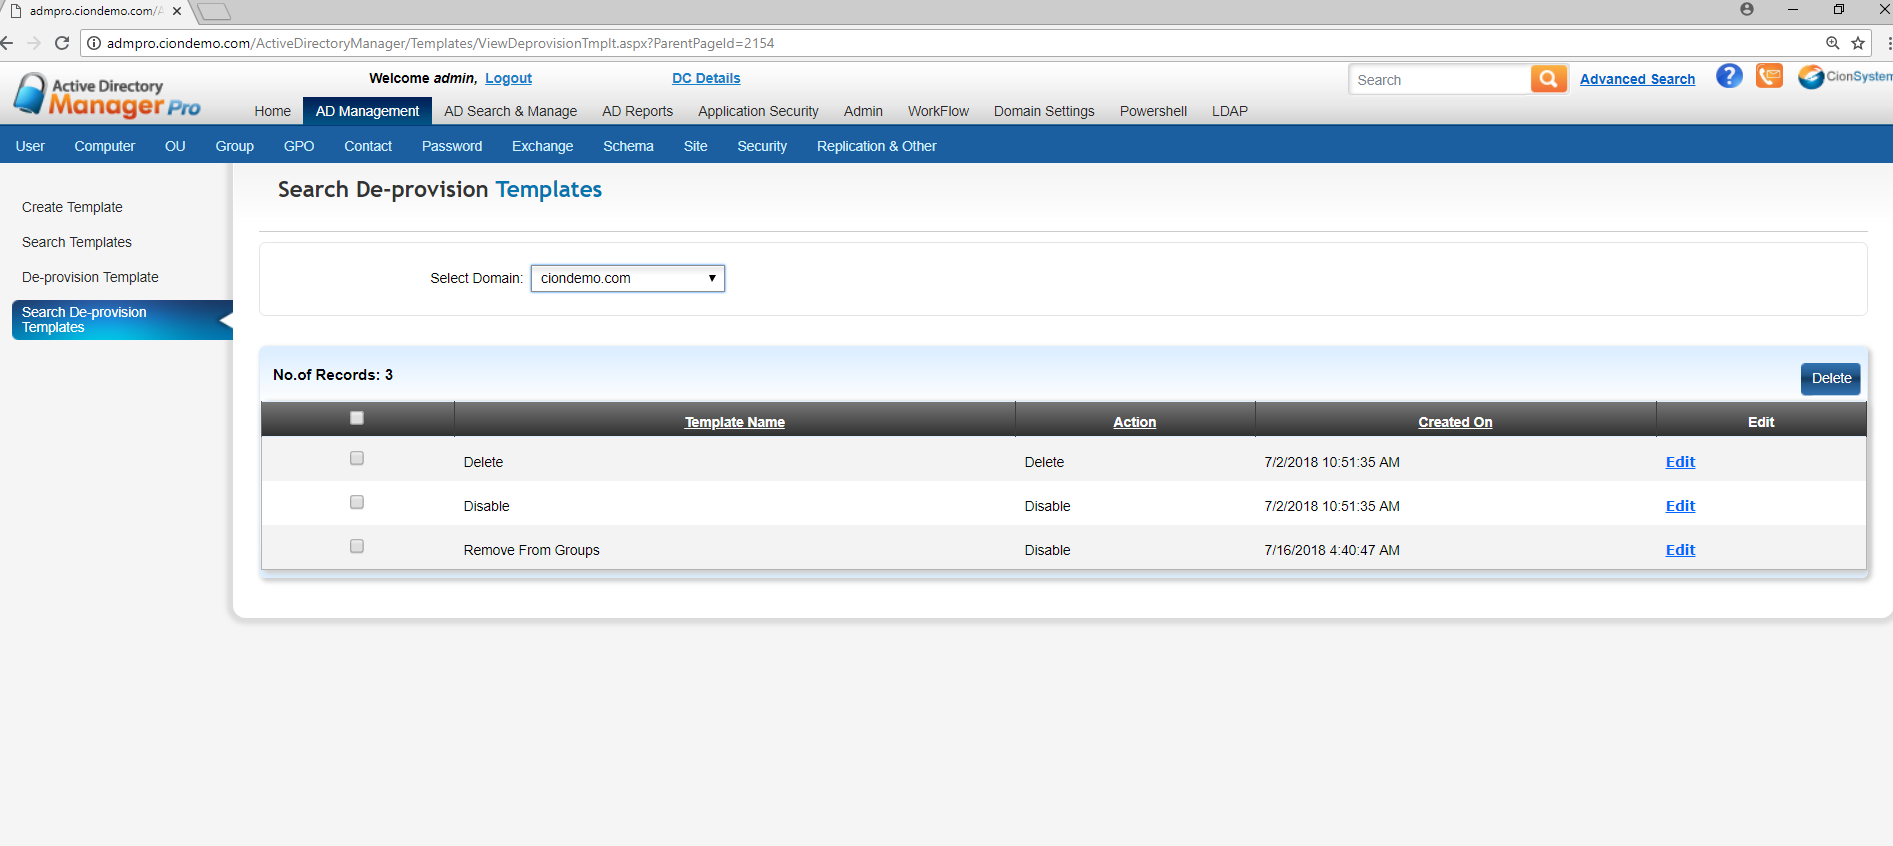
16.By selecting any template in above screen you can edit or delete templates.

B. Applying De–Provisioning Template :

  1. Go to AD Management à User à Others -àClick on De–Provisioning
  2. Click on create button
  3. Now select the template which you want to apply on user. In below Image created template has been selected as remove from groups4.Select the user which has to disable and remove from groups as shown below5.When you applied remove from Groups template then it will disable the user and remove this user from group as the selected user is a member of a group
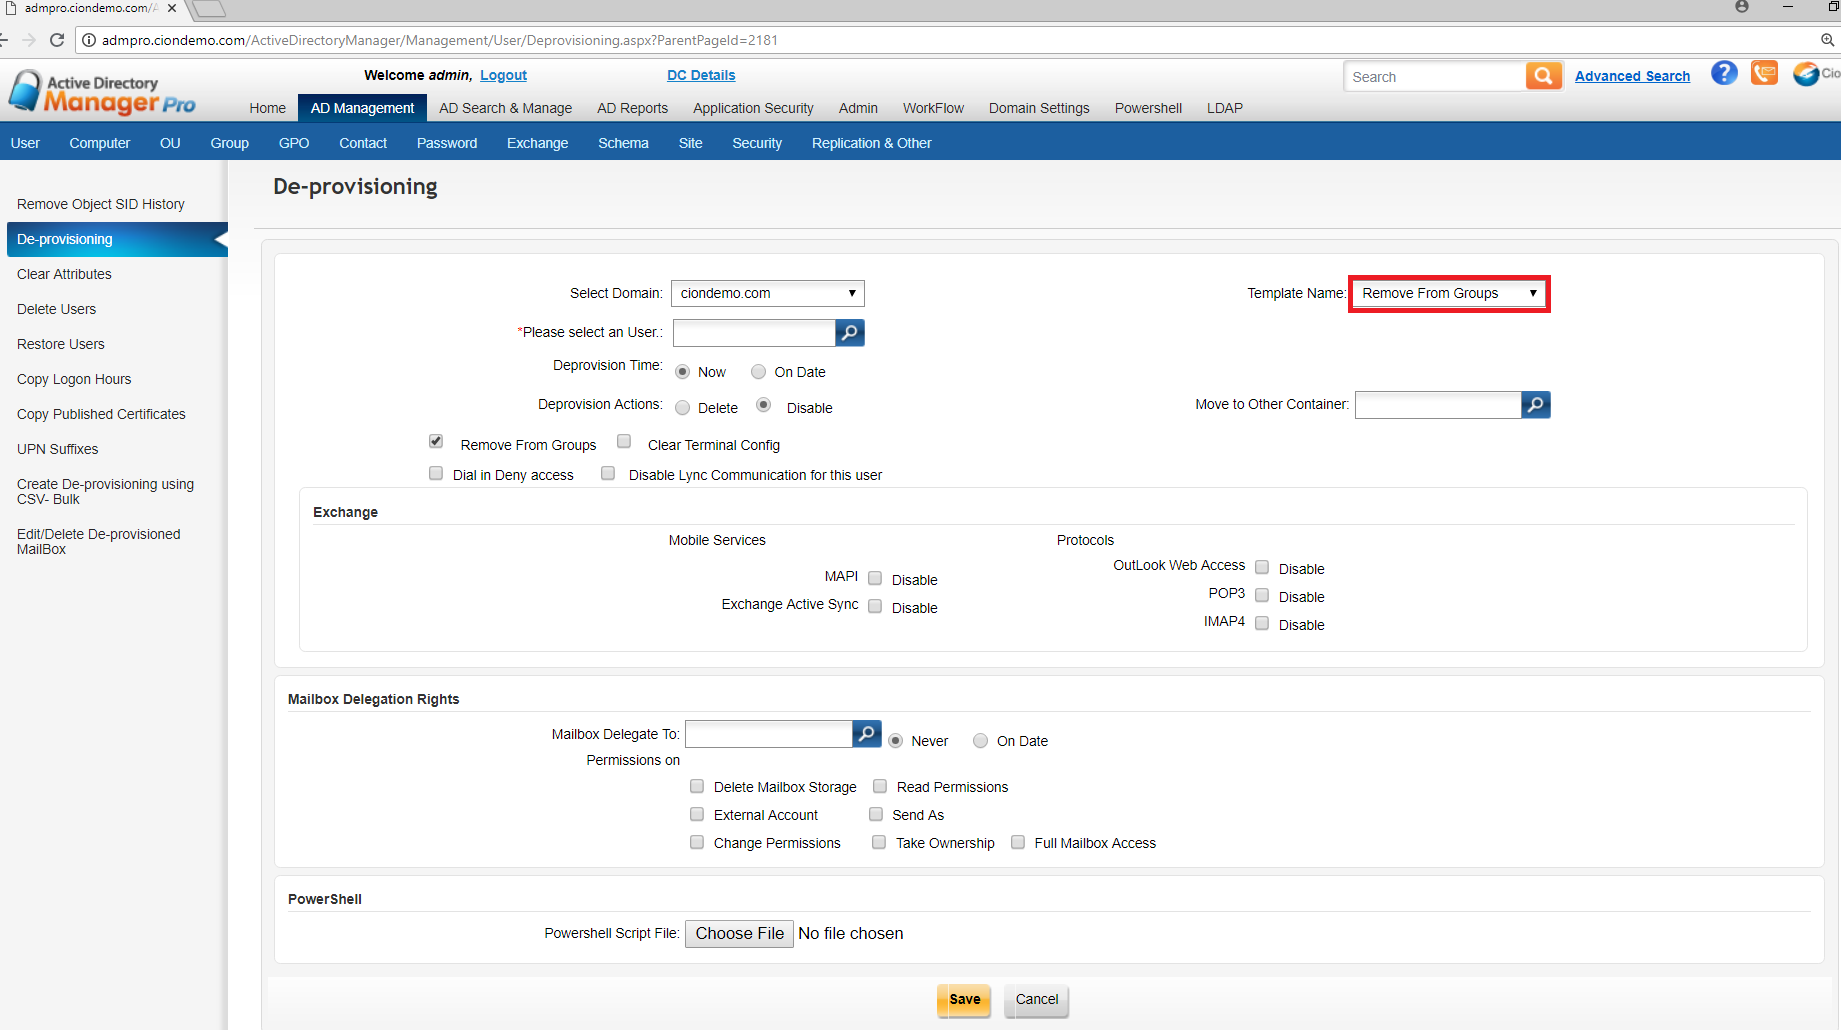
  4. Select the user which has to disable and remove from groups as shown below
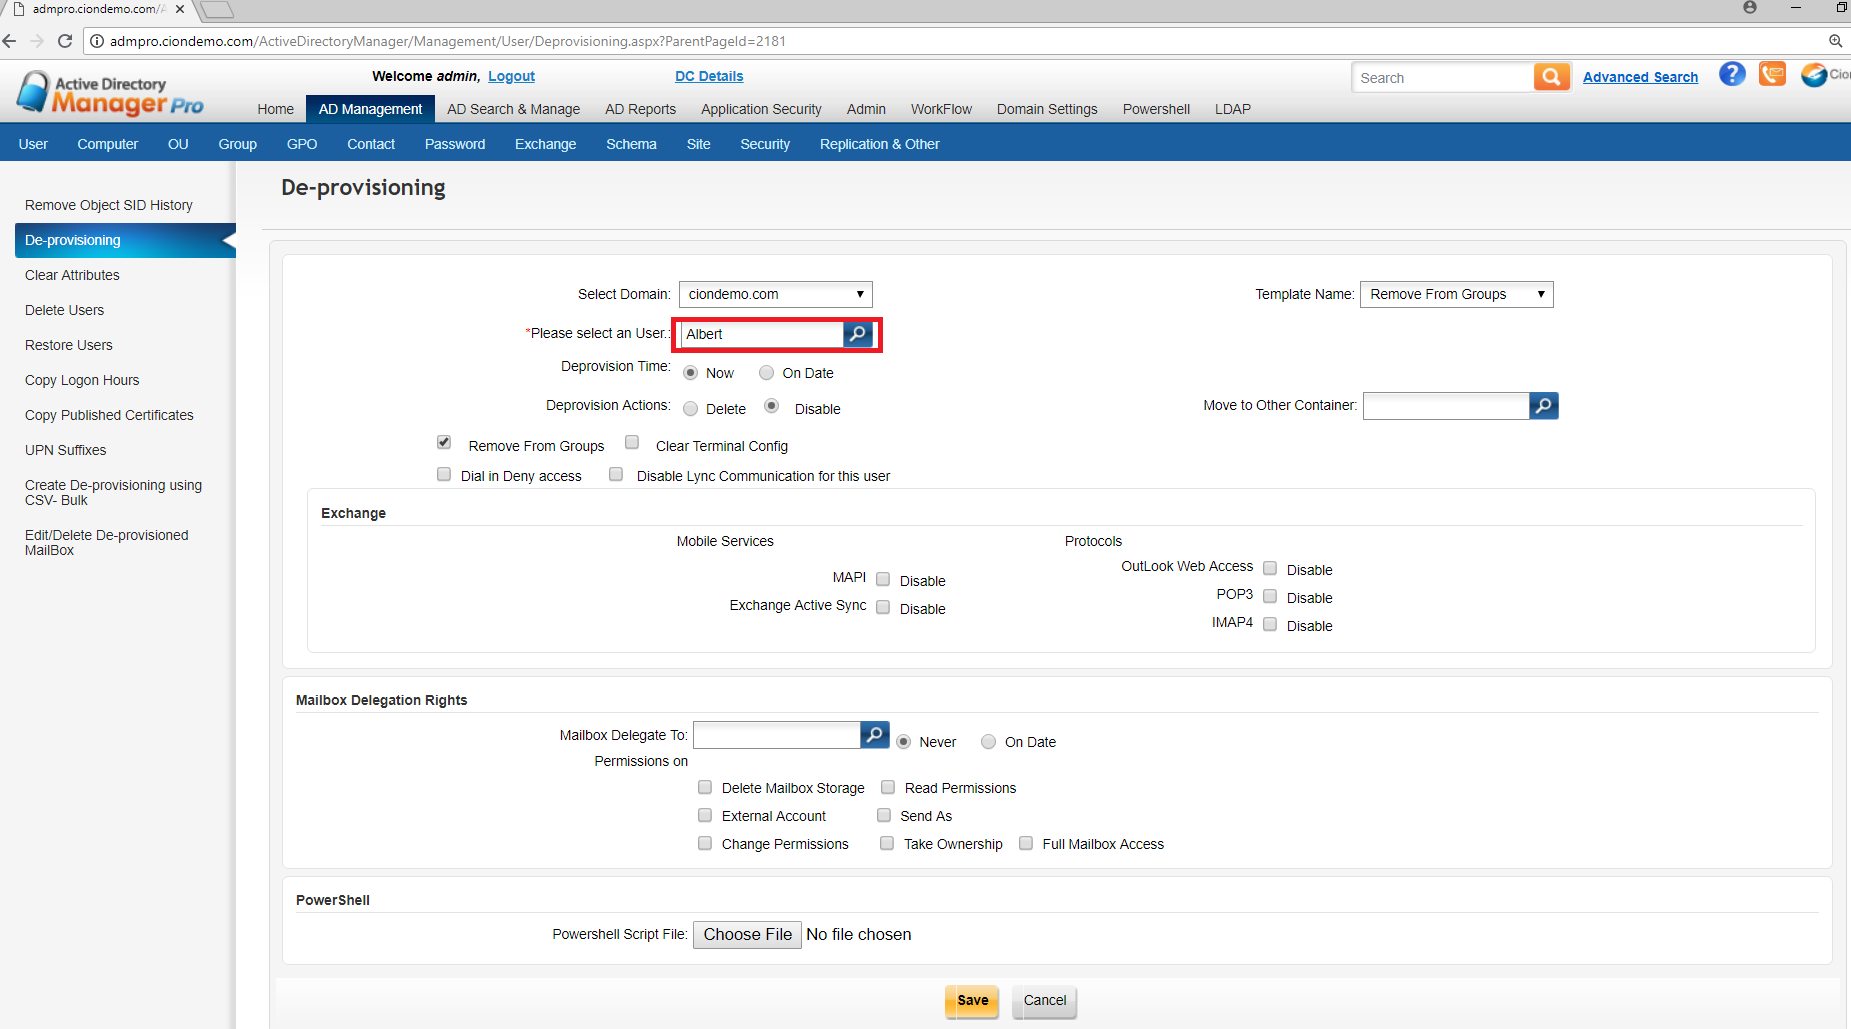
  5. After selecting the user, if required select move to other container option as shown below in the Image and click on save button.
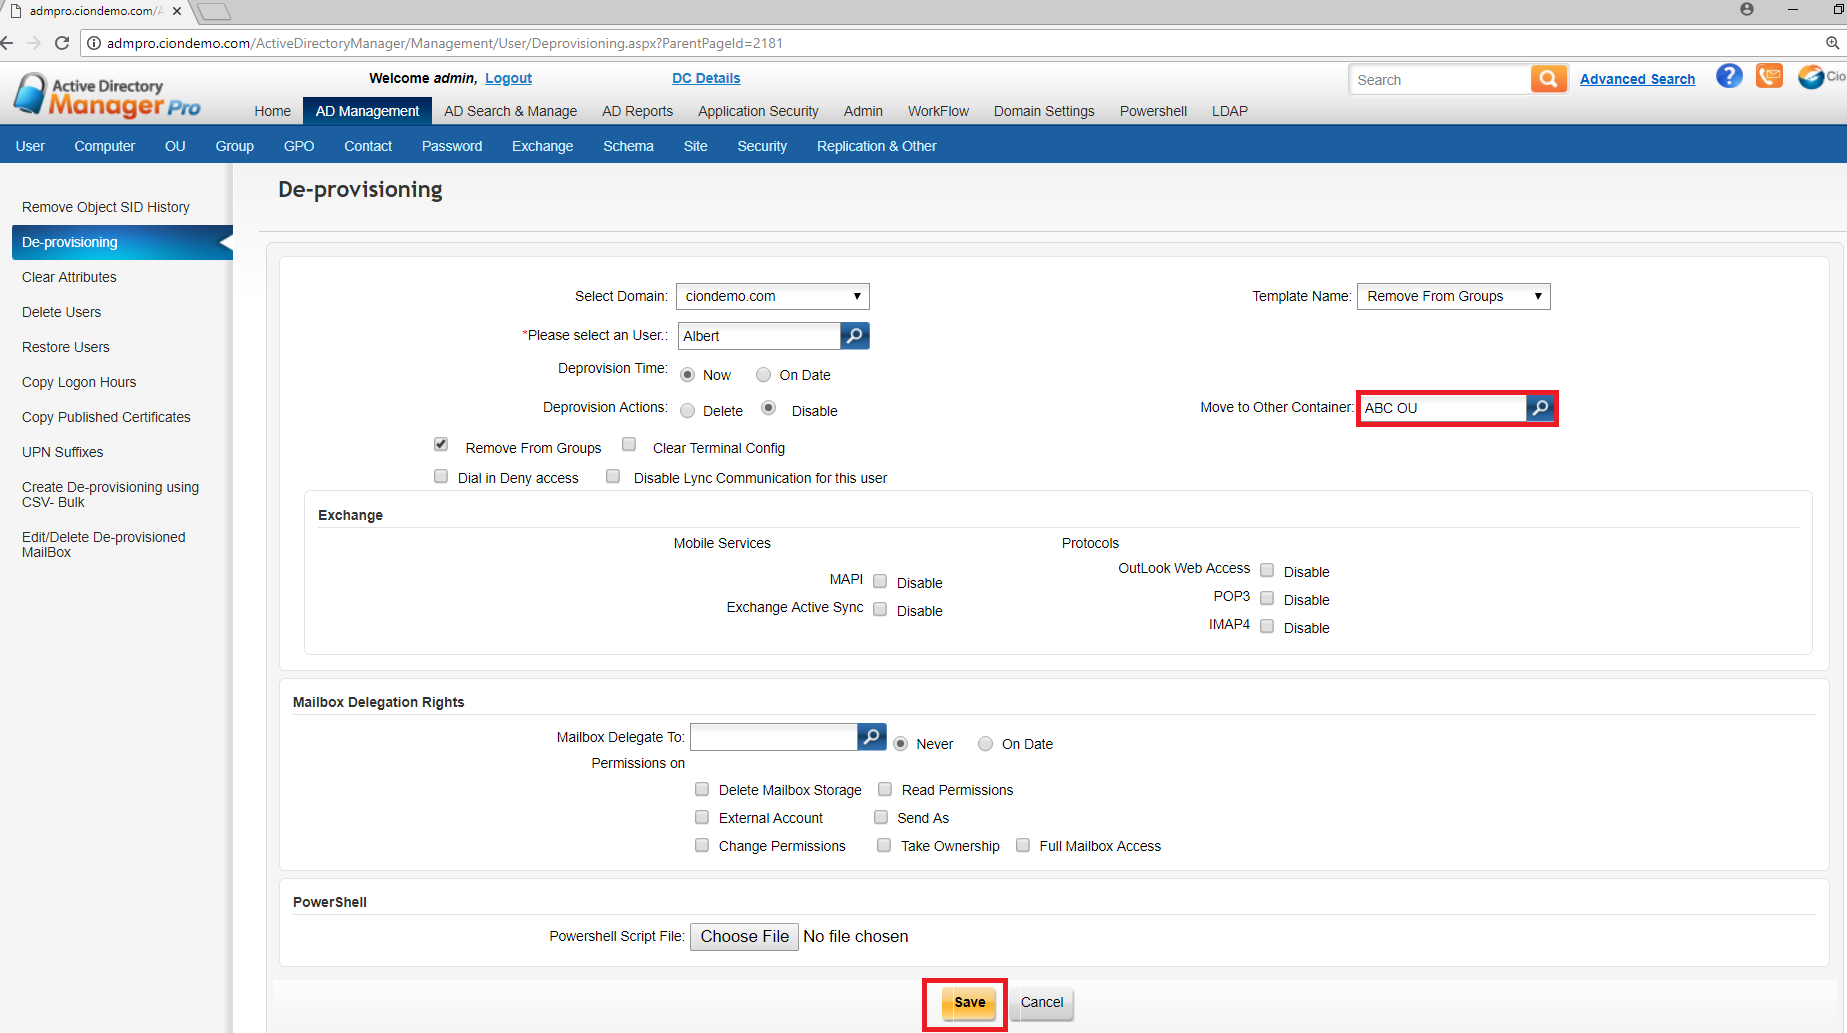
7.Once you click on save it will pop up the message as user De–Provision applied successfully as below
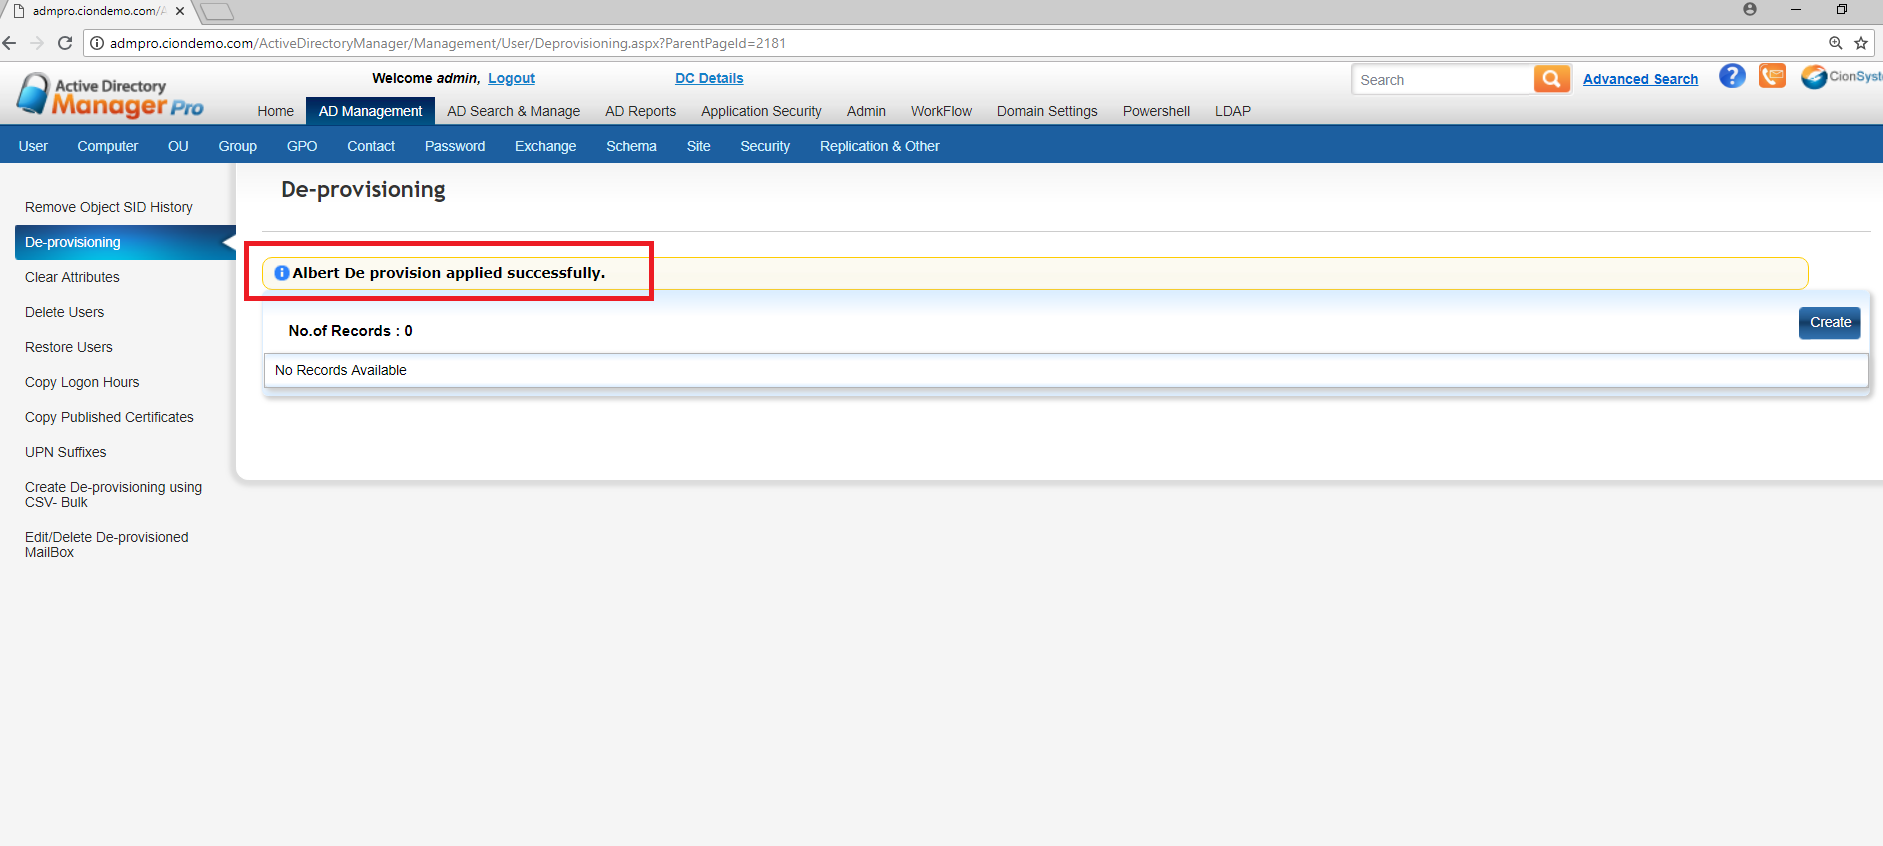
8.Now Go to AD Management à User à Modify à Search Users àSearch for the selected user for De–Provisioning
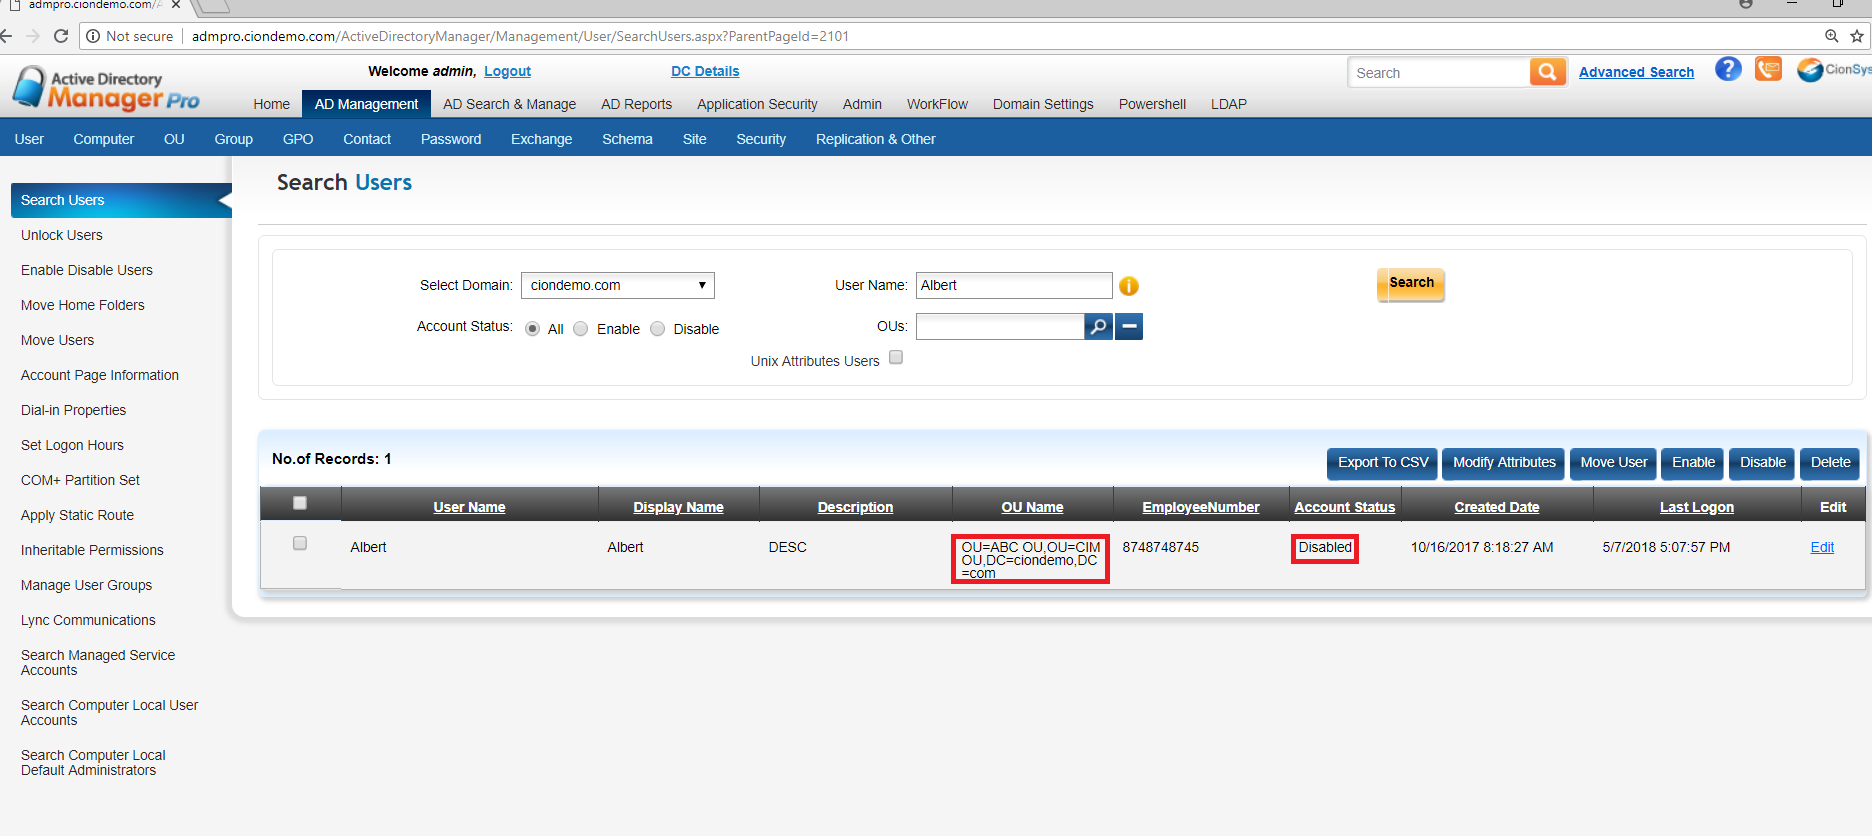
9.In the above Image you can view that user is disabled and moved to other container as OU1.

10.When we click on edit option
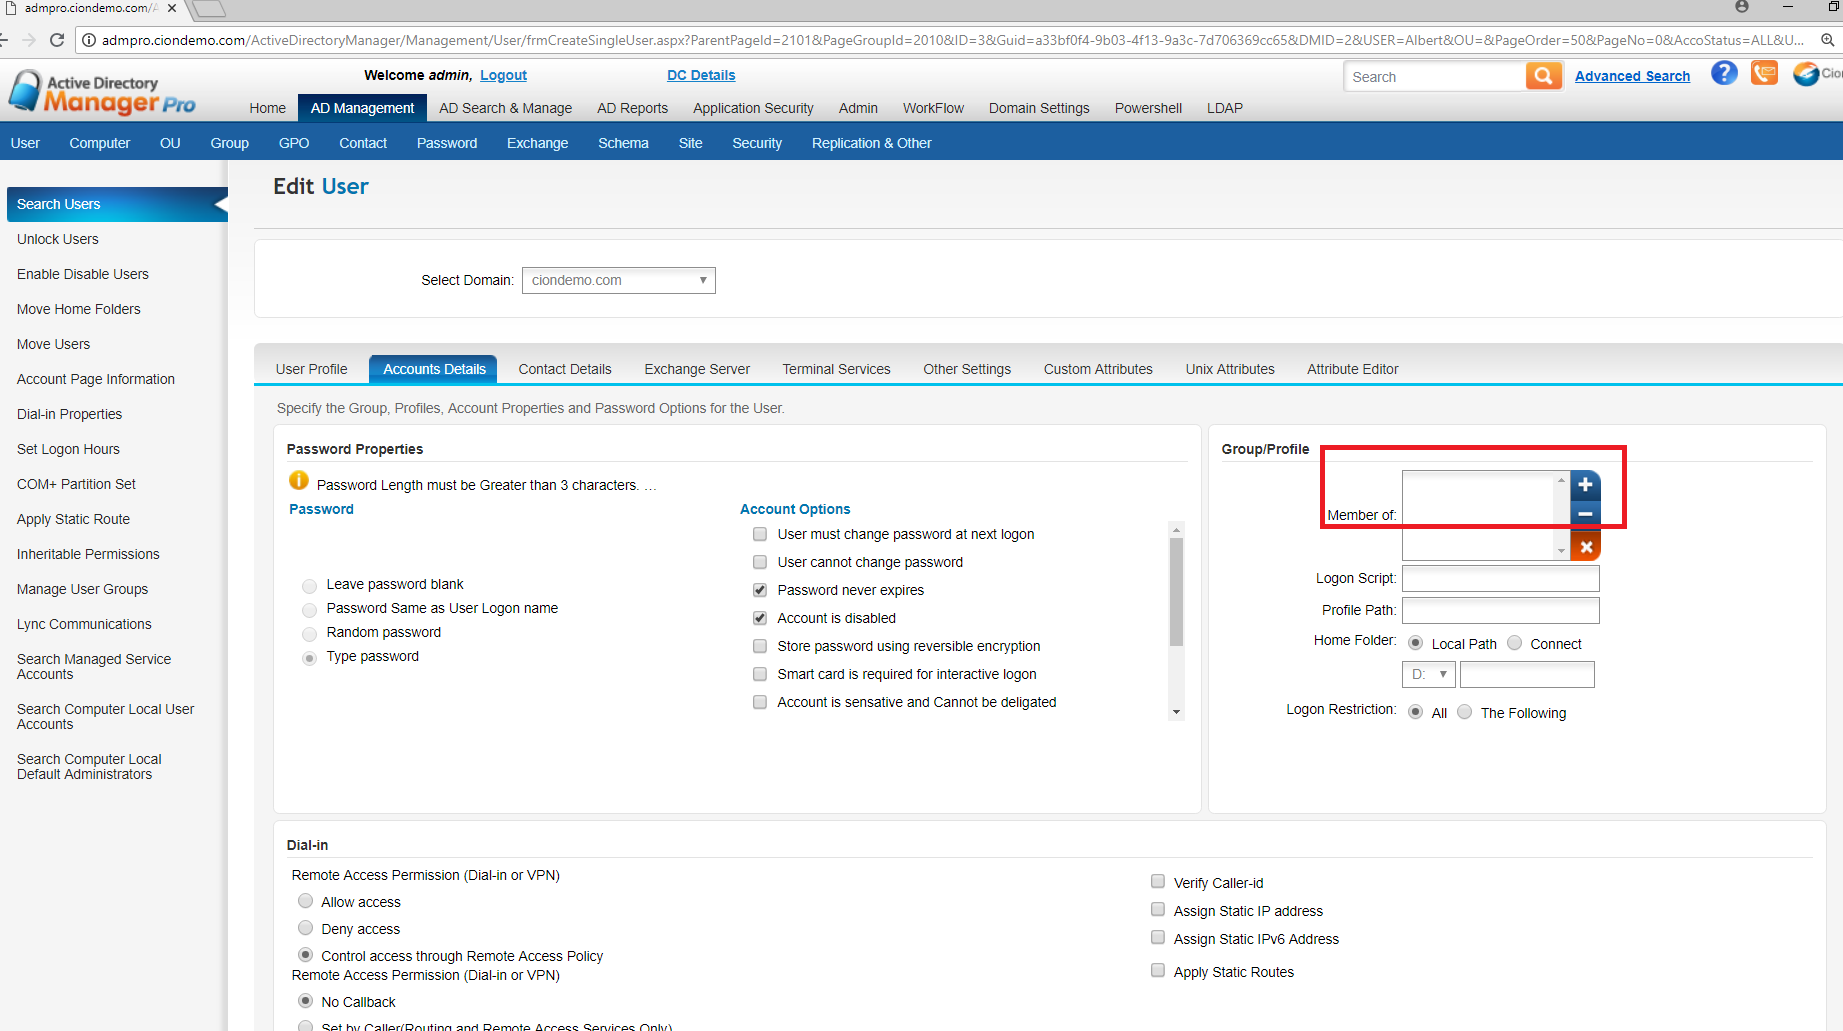
11.In the above Image user is not a member of the group and the selected user is removed from the group.

As mentioned above we can apply disable or delete De–Provision default templates

When you apply disable user will be disable, when you apply delete user will be deleted from the Active Directory.

C. Applying De–Provisioning Template Using CSV Bulk :

  1. Go to AD Management à User à Other à Click on create De–Provisioning using  csv bulk.
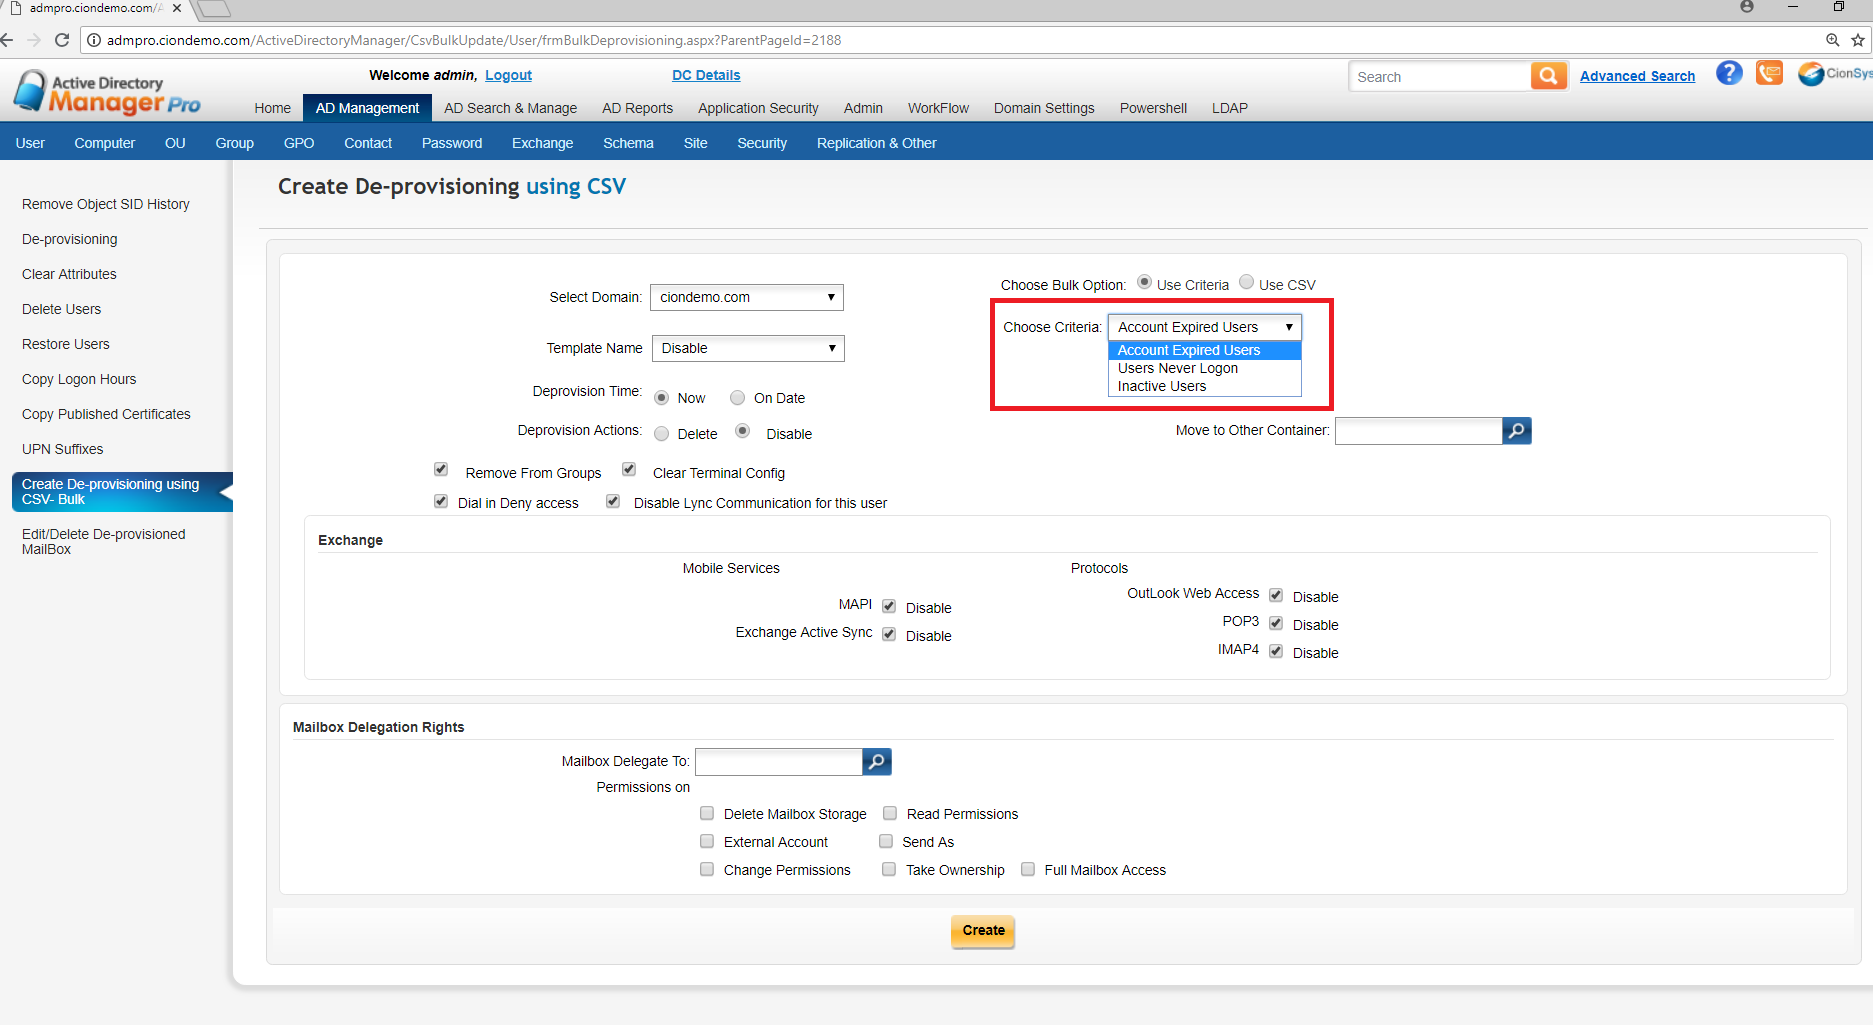
2.Choose bulk option as use criteria or use csv.

3.If you select the option as use criteria in choose criteria option it will display the available list as shown above.

4.Choose any one option and choose any template in template name list.

5.In this Image delete template and selected De-provision time as on date and given date and time to perform delete action.
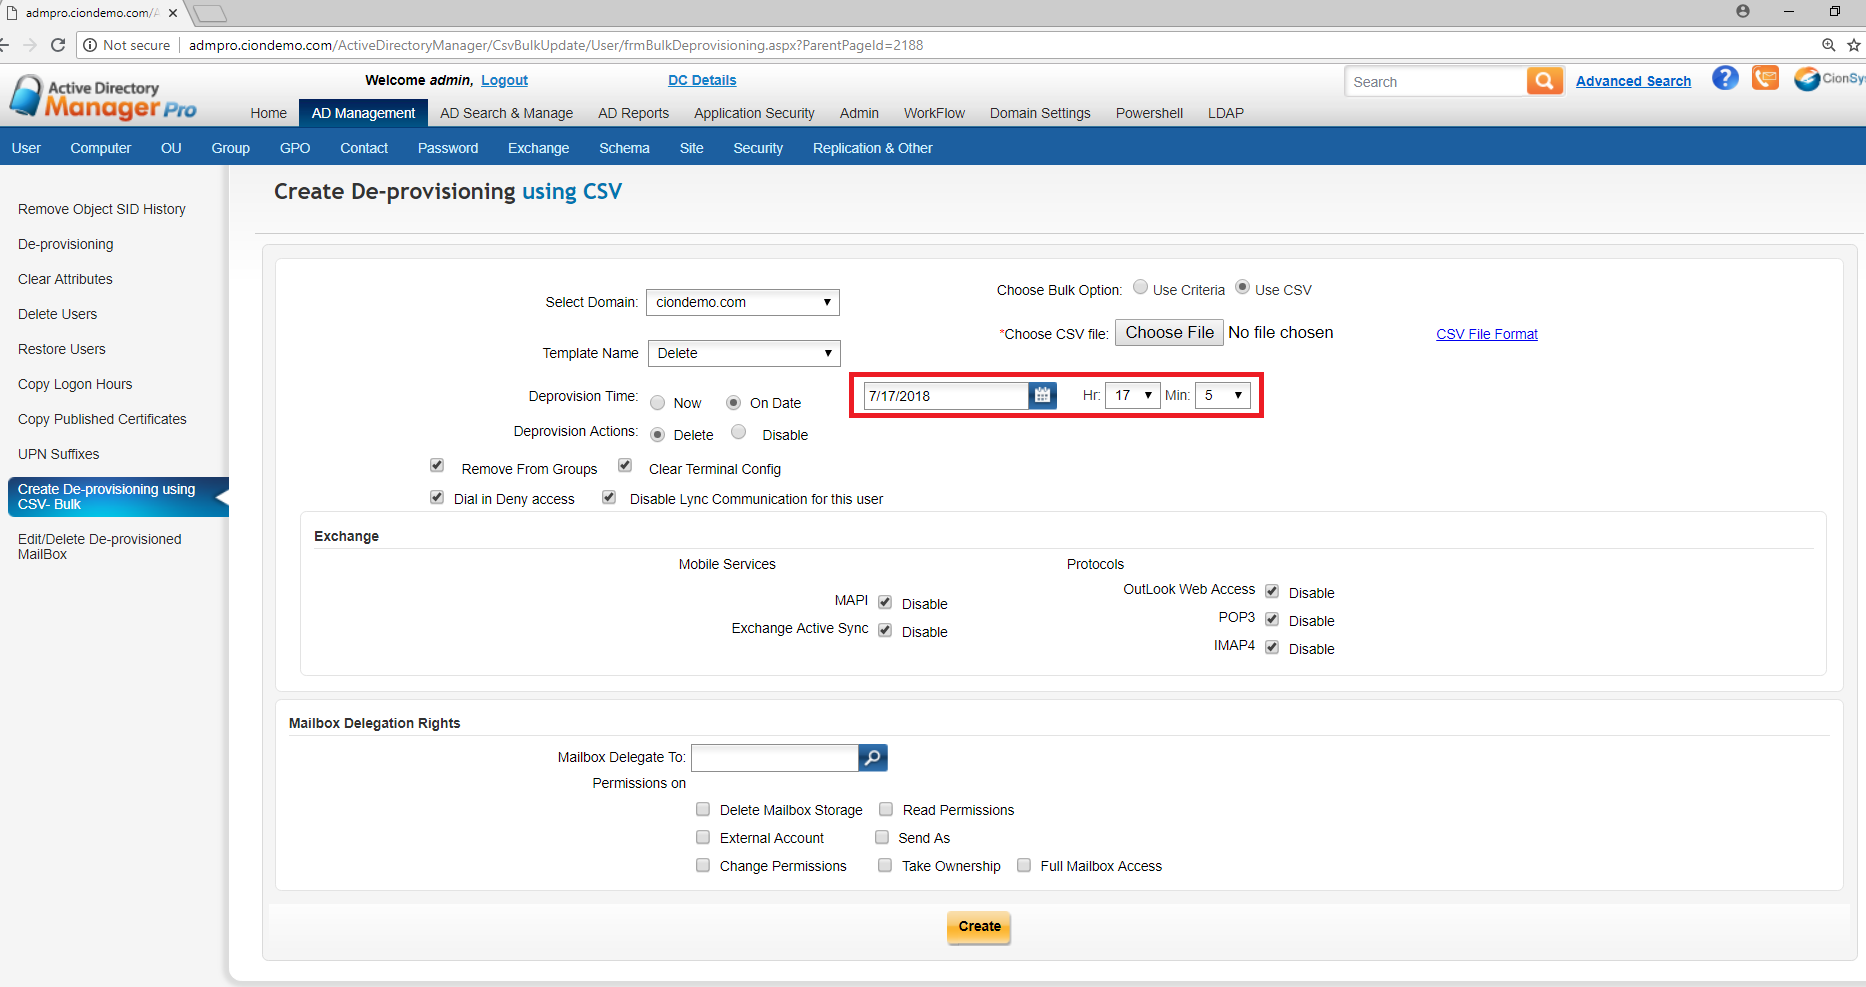
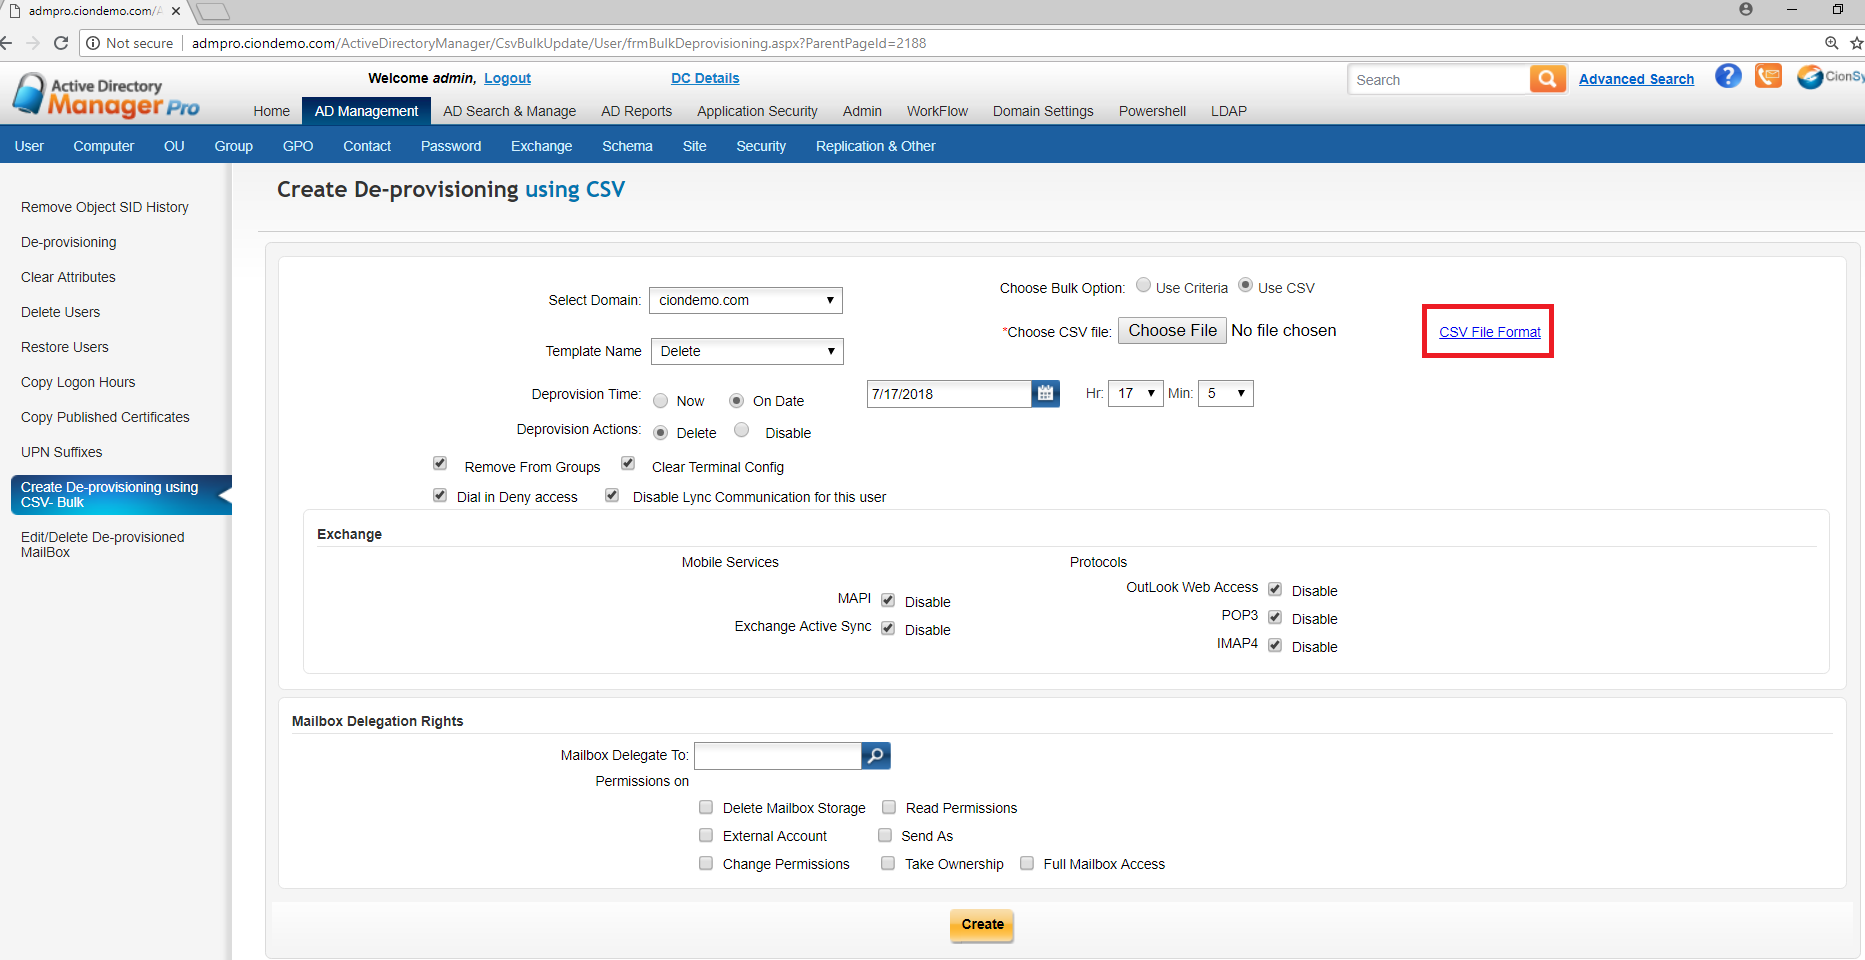
6.If you select use csv option then download the csv file format as shown below.
7.In csv file enter the user names on which it should be applied.
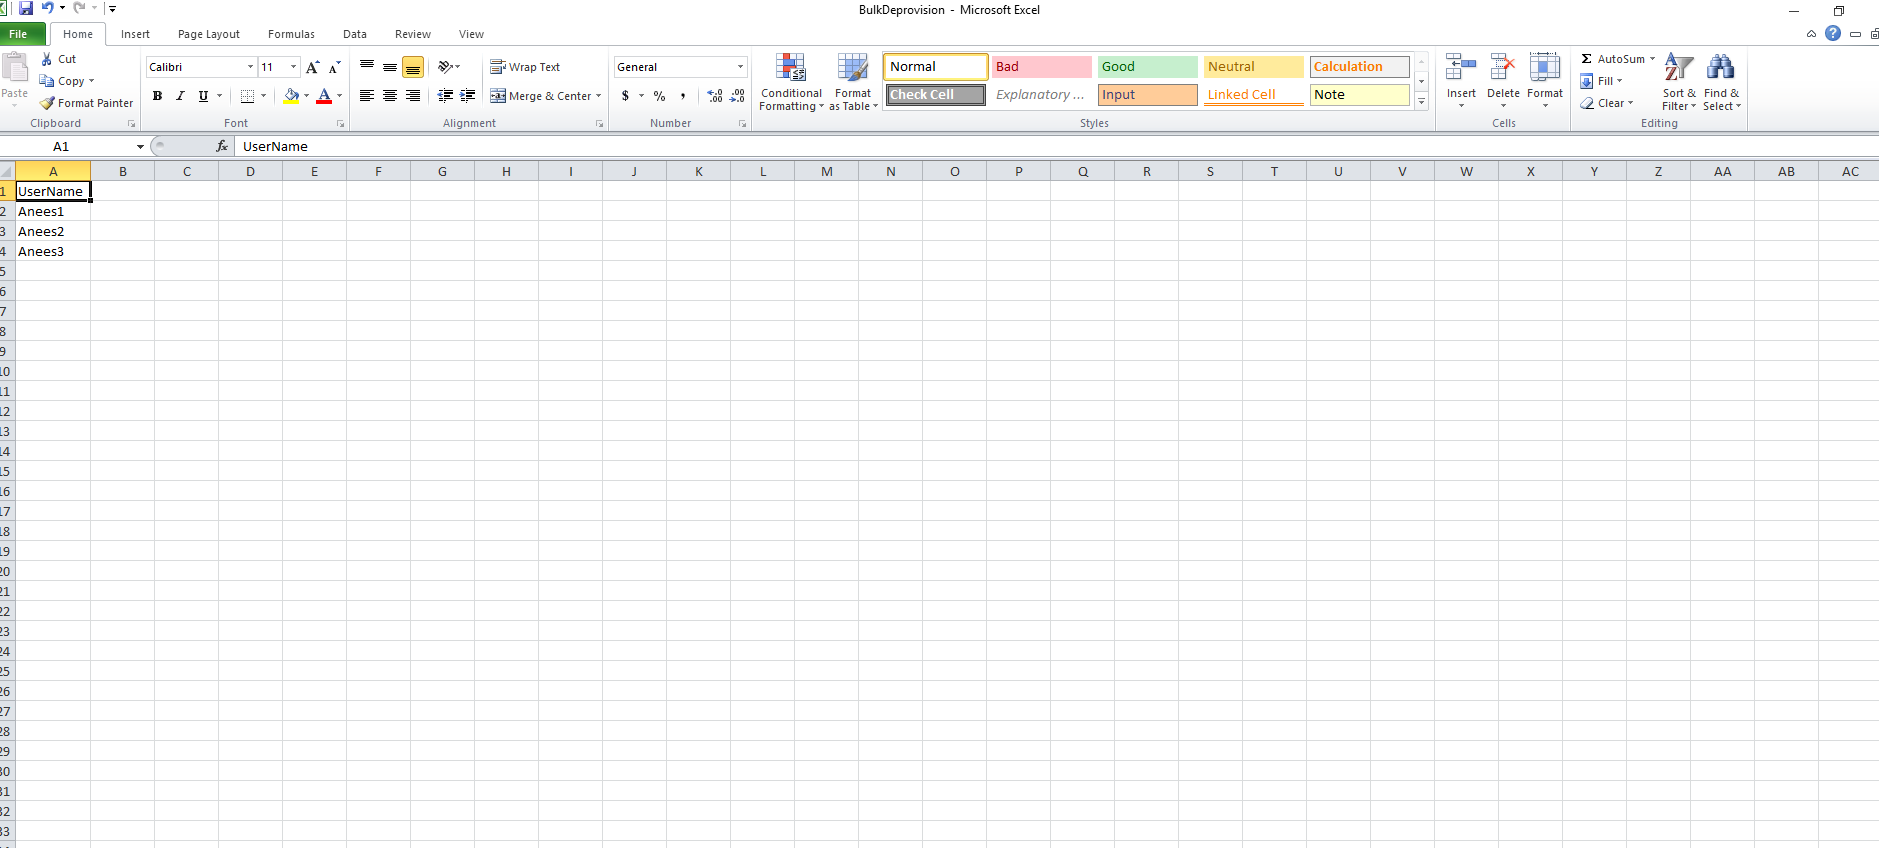
8.After entering the user names  save this file.

9.Now in Create De-provisioning using csv screen upload this file by selecting browse option as below.
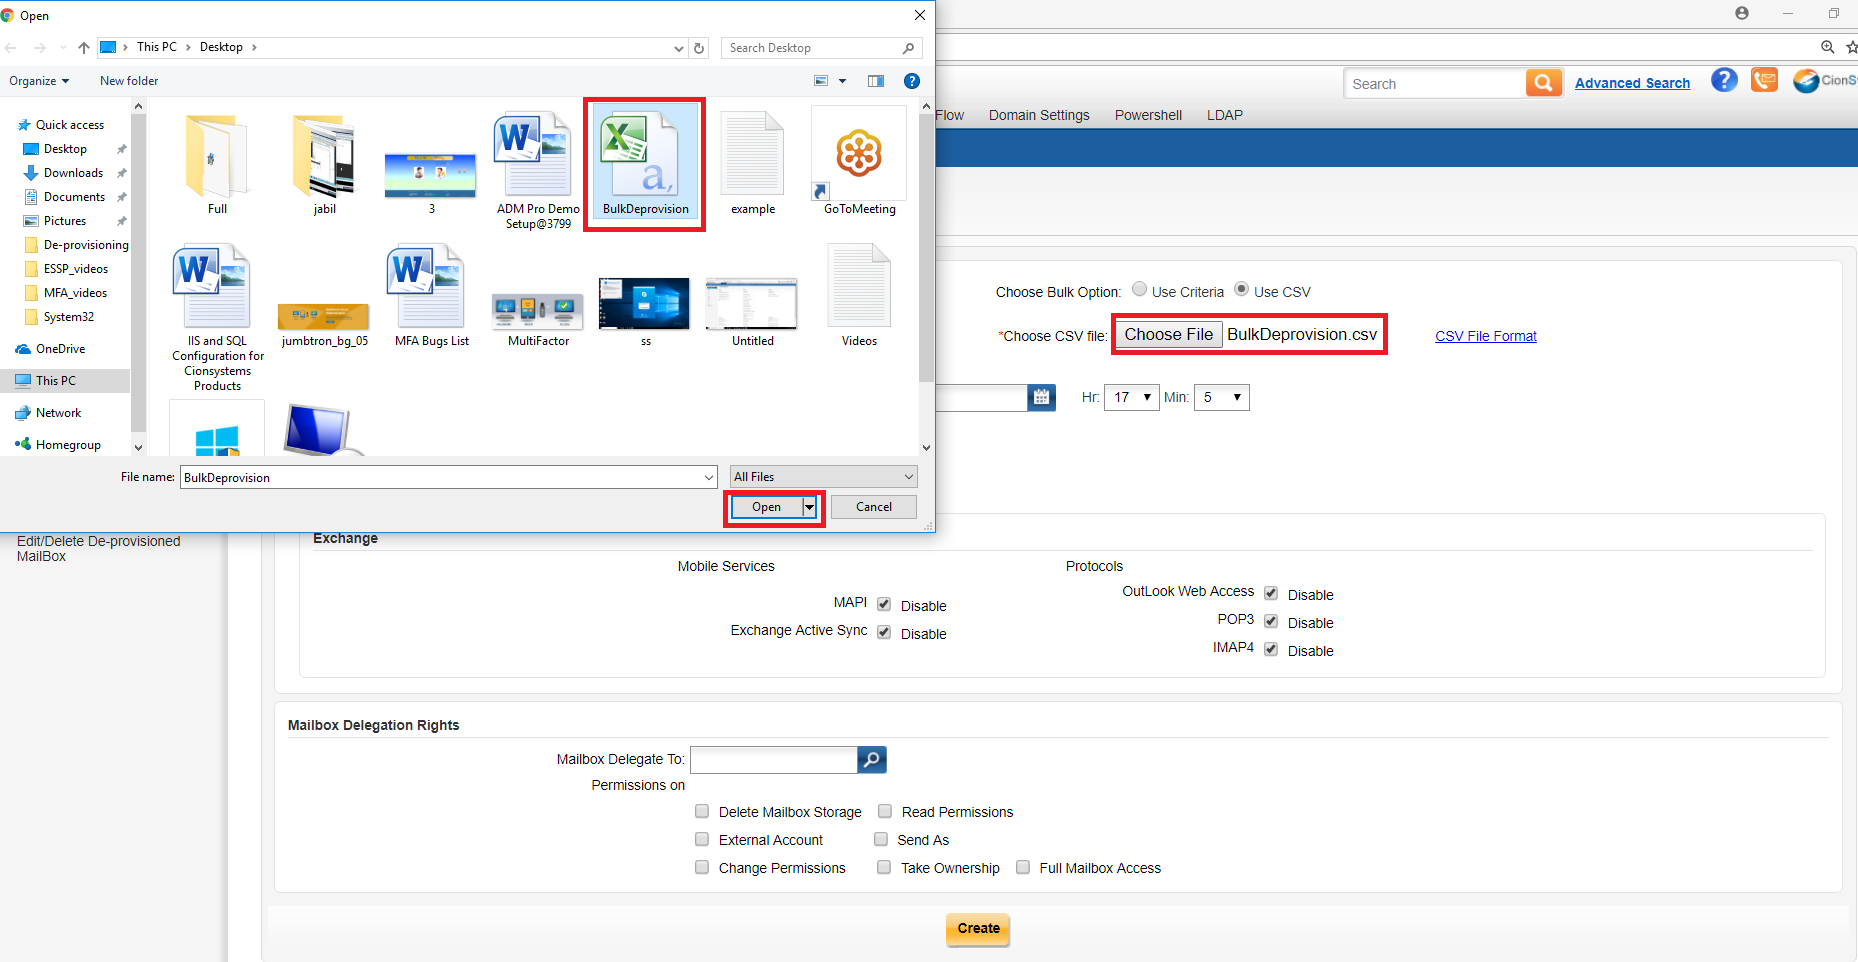
10.By selecting the open button

11.After that click on create button as shown below.
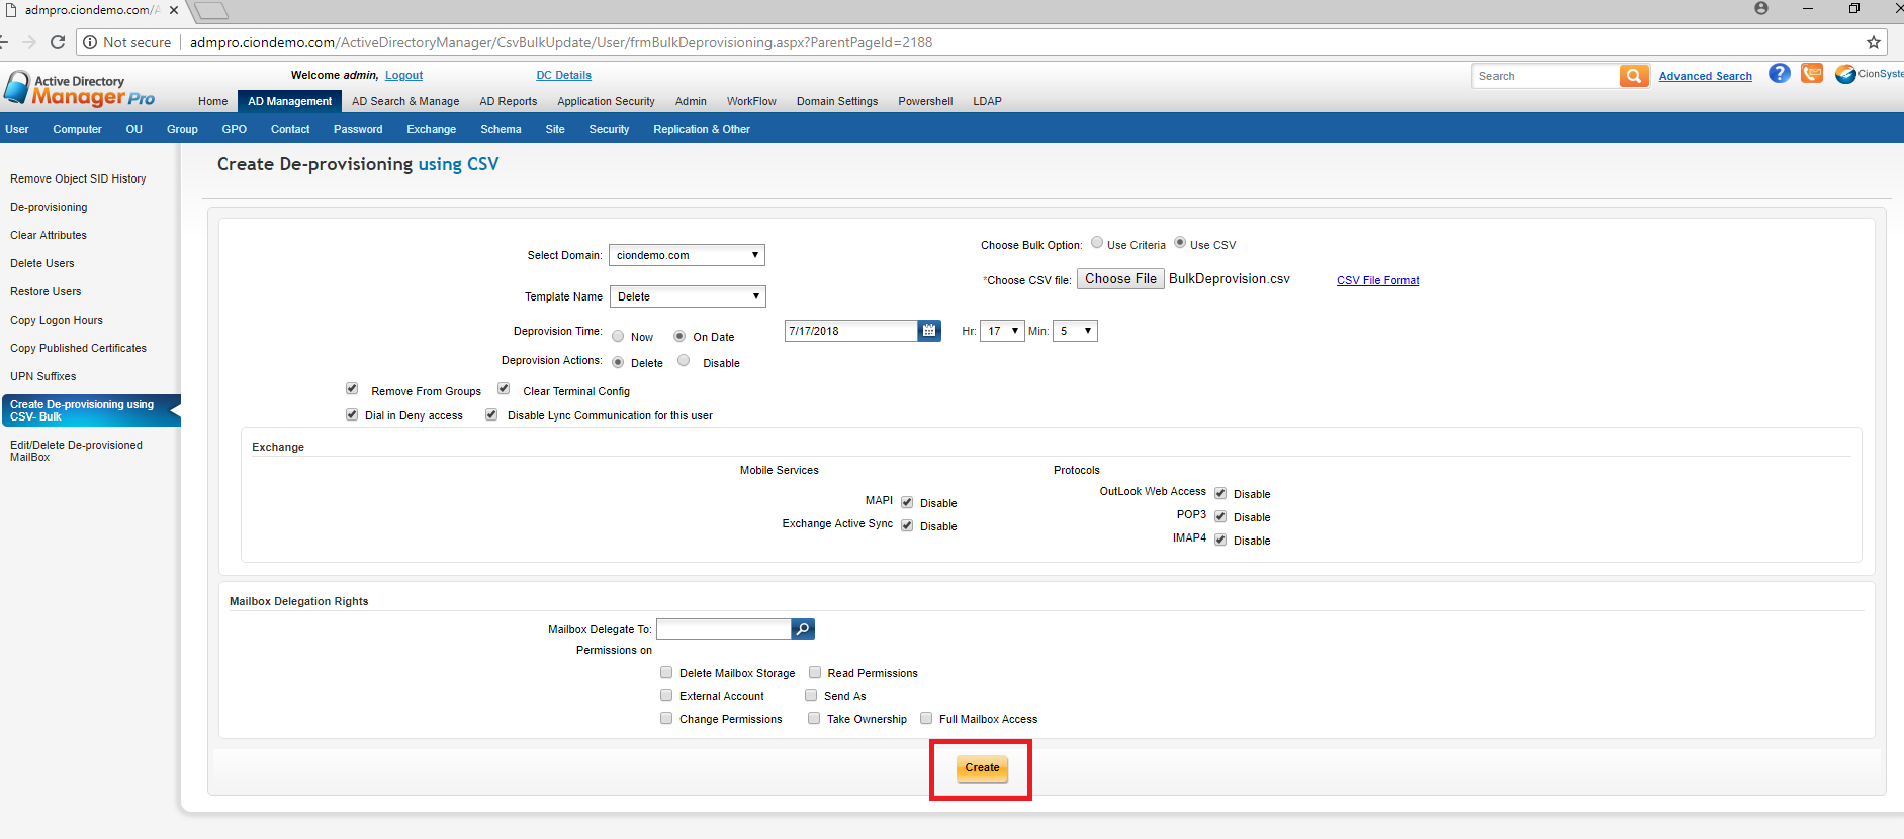
12.Once you click on create it will display the message as schedule created successfully and it will display the status as success.
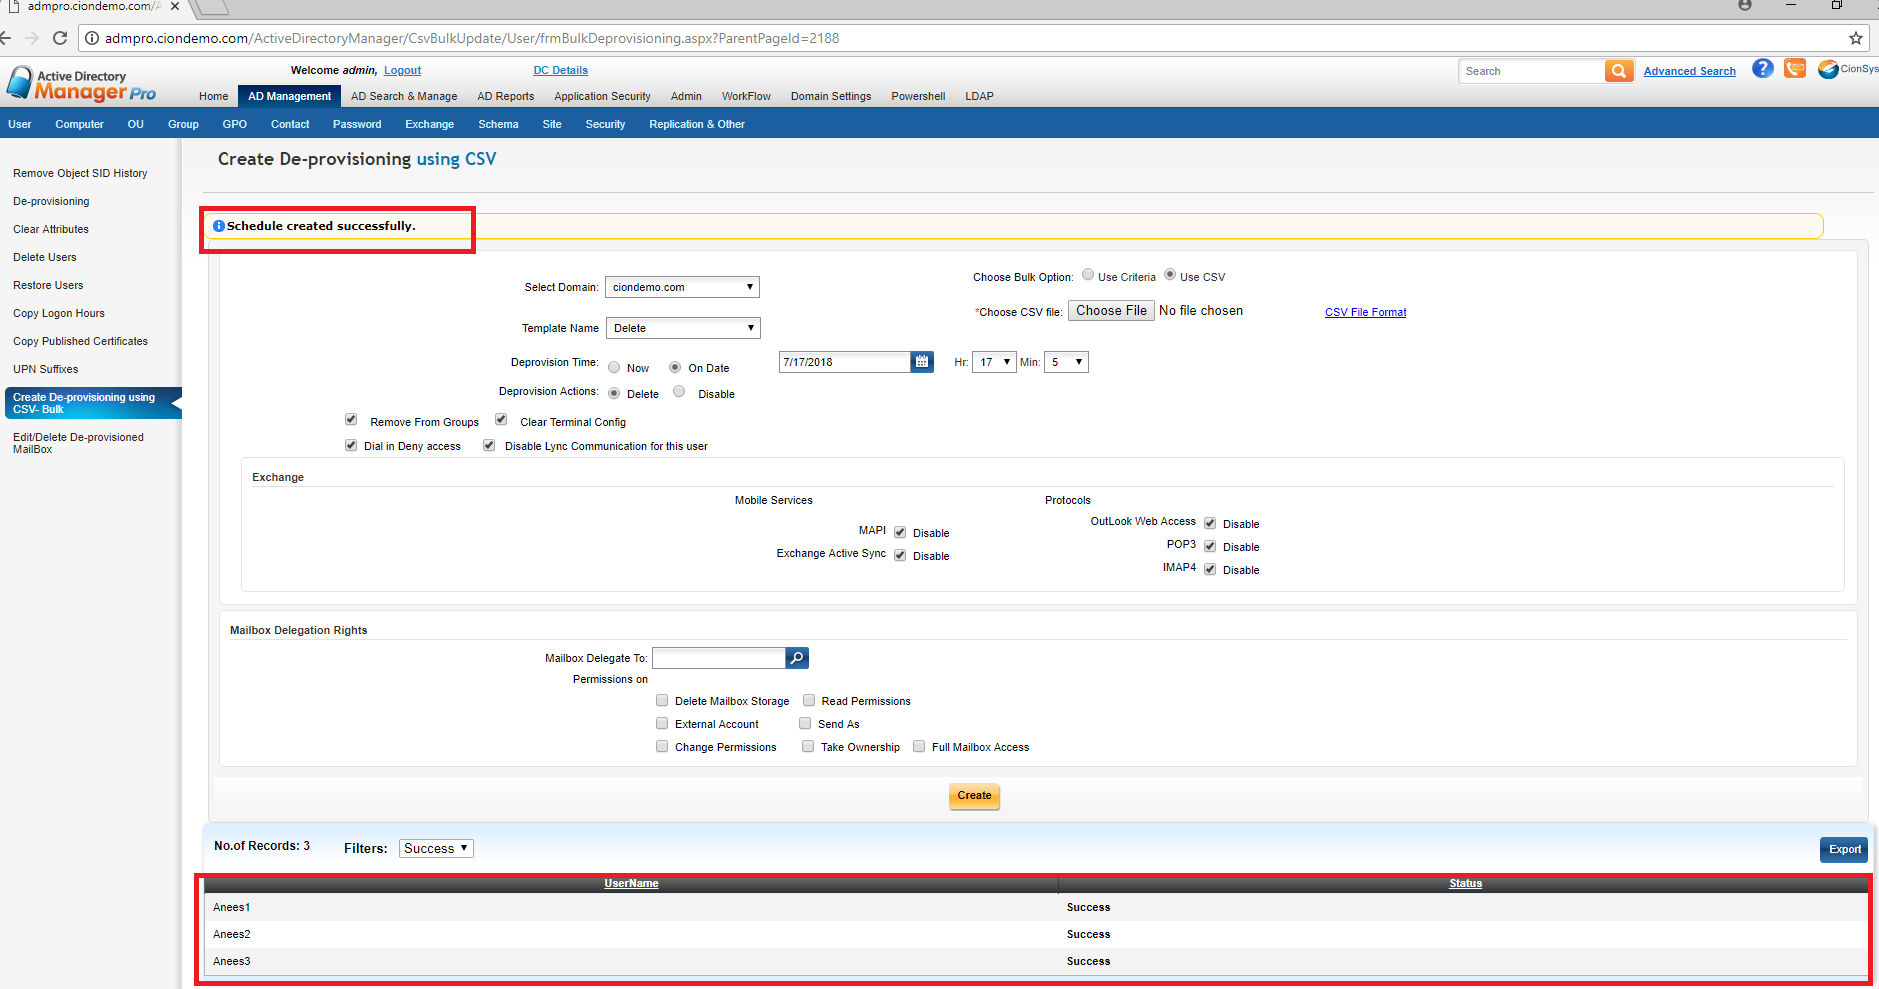
13.Once the schedule date and time exceed then the above users will be deleted from the Active directory.

14.As mentioned above you can apply De–Provisioning on users by applying different templates.

IIS Configuration on Windows Server 2008 R2

1.  Configure the IIS with the following Features (Common HTTP Features -> Static Content ->Default Document -> WebDAV Publishing

2. Select Management Tools à IIS Management Console

3. IIS 6 Management Compatibility àIIS 6 Meta base compatibility

4. In Application Development -> Select ASP.NET, .Net Extensibility, ISAPI Extension, ISAPI Filters

IIS Configuration on Windows Server 2012R2,Windows Server 2016 and 2019 for Cionsystems Products

  1. To configure the IIS on Windows Server 2012 R2 and Windows Server 2016 below mentioned features are required to configure in IIS for Cionsystems Products.
  2. Go to Server Manager select the IIS option click on the small arrow button for Common HTTP Features option select the below features

Common HTTP Features àDefault Document, Static Content, WebDAV Publishing.

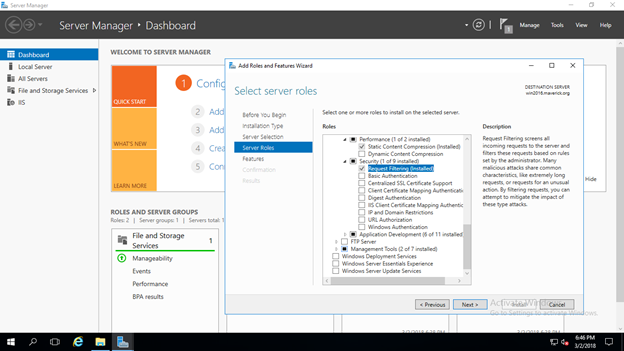
3 . From Performance menu select the Static Content Compression.

4.  In Security Roles select the feature Request Filtering

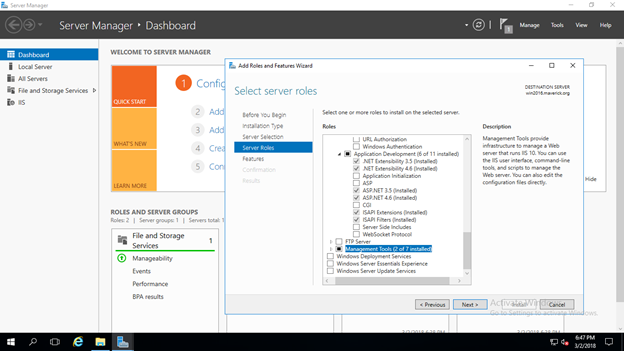
5.   In Application Development Roles, Select the .Net Extensibility 3.5, .Net Extensibility 4.6, ASP.NET 3.5, ASP.NET 4.6, ISAPI                          Extension, ISAPI Filters

7.  In Management Tools select IIS Management Console

8.  In IIS 6 Management compatibility select IIS 6 Metabase compatibility .

This completes the configuration of IIS on the Server.